
I used to find yeast terrifying. It felt like a volatile science project I was destined to fail. But this bread changed my mind completely. I know we usually chat about savory stuff here. You probably come looking for hearty Dutch Oven Chicken Recipes or filling Dutch Oven Meals to feed a crowd. Maybe you want classic Dutch Oven Recipes Dinners to warm your bones on a cold night. Those are wonderful. We all love easy Dutch Oven Dinners or sticking a fork into tender Dutch Oven Chicken Thighs. But here is the thing. You need good bread to sop up all that delicious sauce. This loaf is hands down one of the simplest Dutch recipes I own. You mix flour, salt, yeast, and water in a bowl. That is it. You do not knead it. You do not stress over it. You just let it sit on the counter while you sleep or go to work. The pot acts like a fancy steam oven. It creates this insane crispy crust while the inside stays fluffy and soft. Honestly, it feels like magic every time I take the lid off. I messed it up the first time by rushing the rise. Don’t do that. Give it time. The yeast does the heavy lifting for you.
Dutch oven recipes hold a special place in my heart because they transform simple ingredients into something magical with barely any effort. I used to think Dutch oven recipes were reserved for professional bakers or people with endless free time, but I was so wrong. This bread is proof that Dutch oven recipes can be approachable for everyone. When I started my blog, I focused on Dutch Oven Chicken Recipes and hearty Dutch Oven Meals because I thought that was what people wanted. While we all love cozy Dutch Oven Recipes Dinners and easy Dutch Oven Dinners, sometimes you just need a slice of good bread. You might even serve this alongside your favorite Dutch Oven Chicken Thighs. Honestly, this is one of the simplest Dutch recipes I know. It requires zero kneading and very little active time. If you have been hunting for Dutch oven recipes that make you look like a star baker without the stress, you have found the right one.
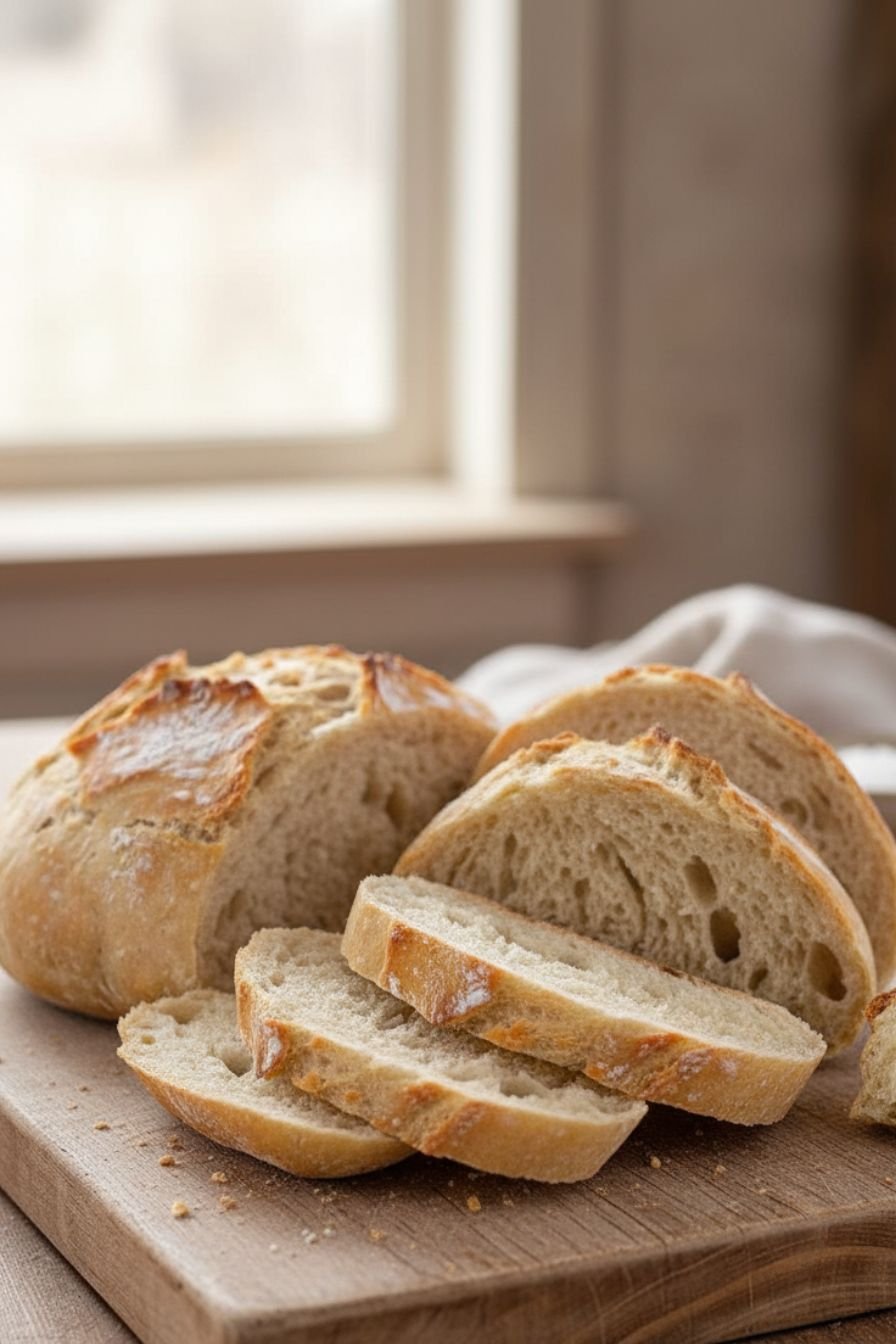
Table of Contents
- 1) Key Takeaways
- 2) Easy Dutch Oven No Knead Bread Recipe
- 3) Ingredients for Dutch Oven No Knead Bread
- 4) How to Make Dutch Oven No Knead Bread
- 5) Tips for Making Dutch Oven No Knead Bread
- 6) Making Dutch Oven No Knead Bread Ahead of Time
- 7) Storing Leftover Dutch Oven No Knead Bread
- 8) Try these Side Dish next!
- 9) Dutch Oven No Knead Bread Recipe
- 10) Nutrition
1) Key Takeaways
- Why is a Dutch oven perfect for baking bread?
- Do you really need to knead the dough?
- How long should you let the dough rise?
- What is the secret to a crispy crust?
2) Easy Dutch Oven No Knead Bread Recipe
Simple. This recipe strips away all the scary parts of baking with yeast. You do not need a stand mixer or strong arms for kneading. You just mix the ingredients in a bowl until they look like a shaggy mess and walk away. It is the definition of set it and forget it. I love recipes that respect my time, and this one lets me sleep while the dough does all the work.
Forgiving. If you are new to cast iron pot baking, this is the best place to start. The dough is very wet and sticky, which keeps the inside soft while the hot pot creates that bakery style crust. I have made this with slightly too much water or left it rising for an extra hour, and it still comes out delicious. It is hard to mess this up if you just trust the process.
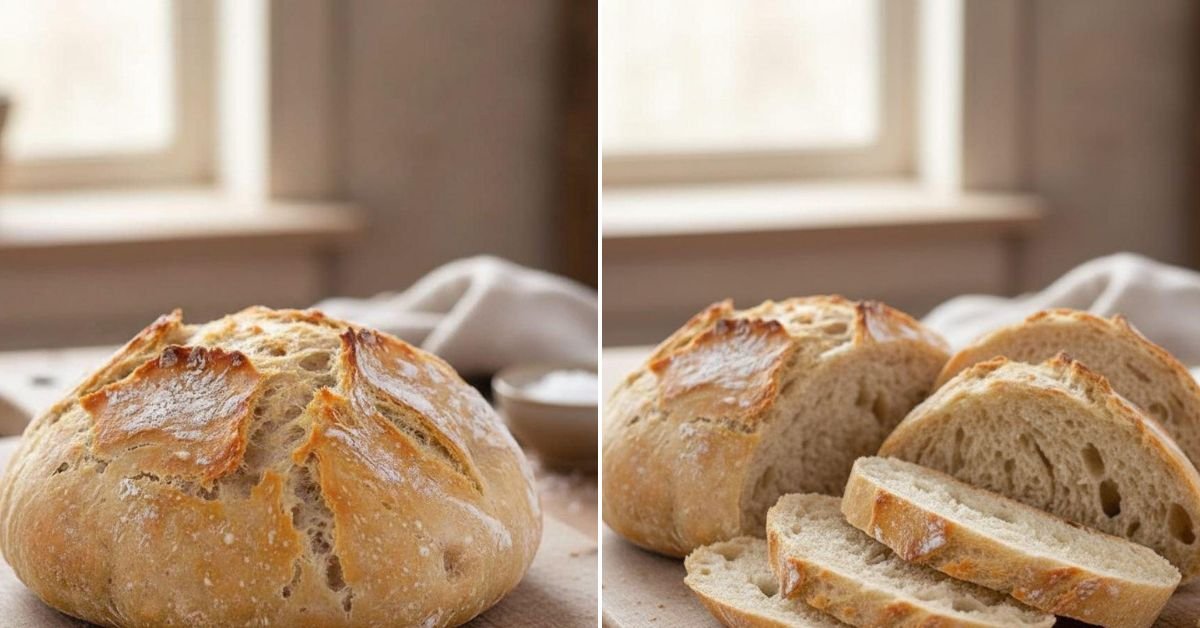
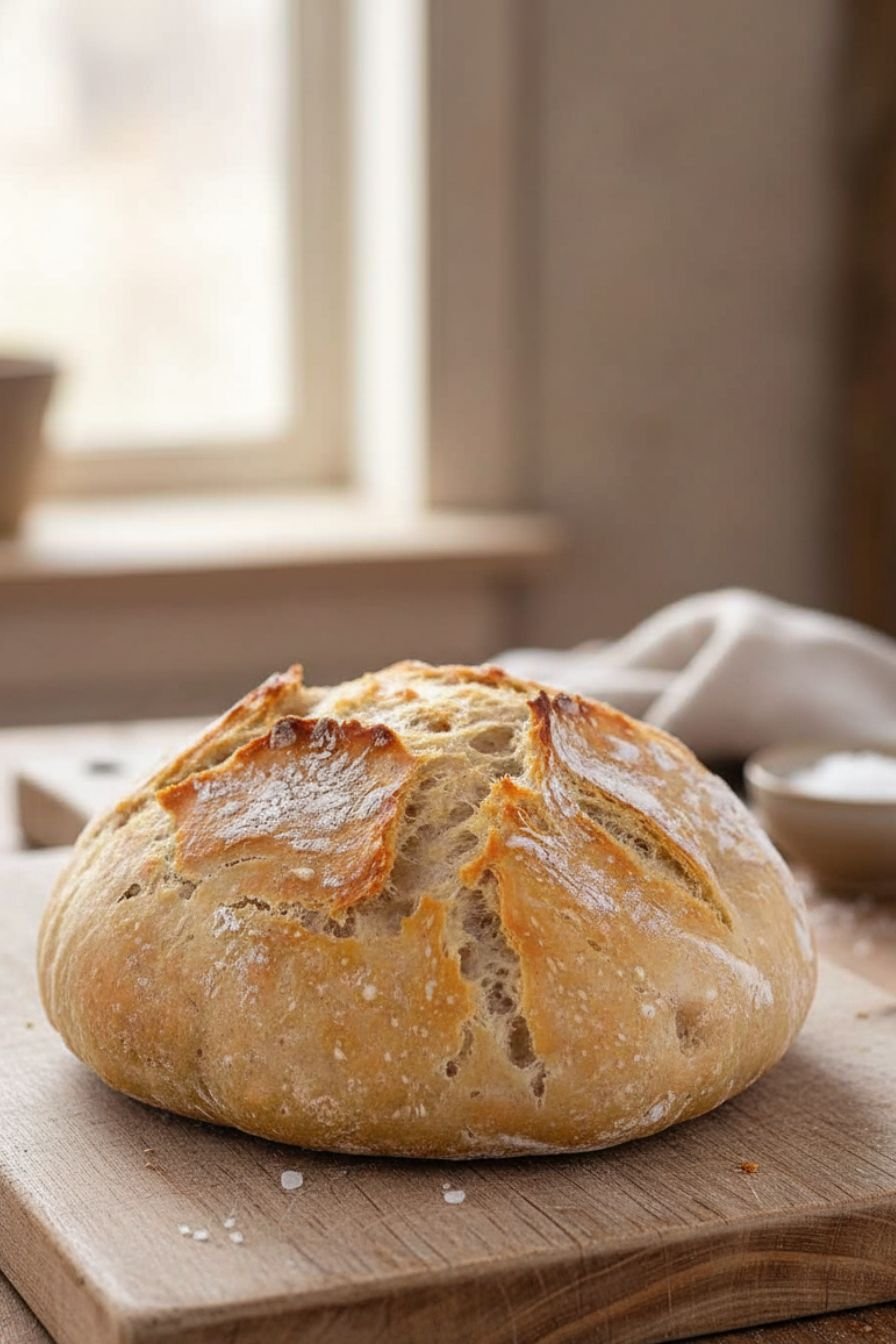
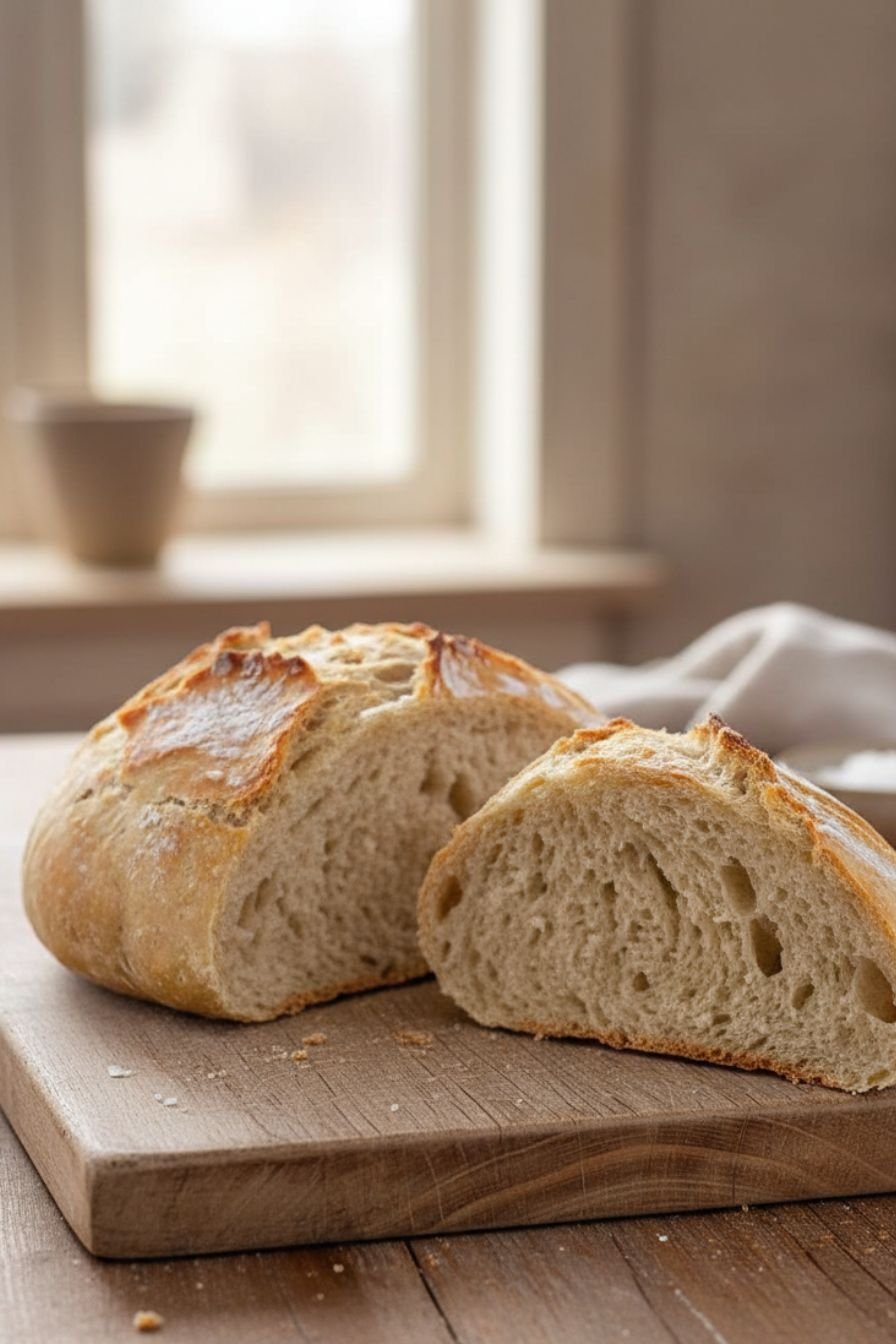
Magical. There is a specific joy in taking the lid off the pot and seeing a pale blob of dough transformed into a golden, crusty loaf. The steam trapped inside the pot mimics professional steam ovens used in bakeries. You get that shattering crisp crust and an airy interior without any fancy equipment. It feels like a magic trick every single time I bake it.
3) Ingredients for Dutch Oven No Knead Bread
All Purpose Flour: You do not need expensive bread flour for this recipe. Good old all purpose flour works perfectly. I buy the big bags because I bake this so often. The protein content in standard flour is just enough to give the bread structure without making it tough. Just make sure you measure it correctly by spooning it into the cup and leveling it off.
Kosher Salt: Bread without salt tastes like cardboard. I use coarse kosher salt because it dissolves well and has a clean flavor. It controls the yeast slightly and strengthens the gluten structure. If you only have table salt, use a little less so the bread does not taste too salty. I learned that the hard way once.
Active Dry Yeast: This is the engine that makes the bread rise. You only need a tiny amount because the long rise time allows the yeast to multiply and do its job slowly. Make sure your yeast is not expired. I keep my jar in the fridge to keep it fresh. If your dough bubbles, your yeast is happy.
Water: Use room temperature water. It does not need to be warm like in quick bread recipes. Since the dough sits for over 12 hours, the yeast will wake up on its own without a heat boost. Tap water is fine, but if your water smells heavily of chlorine, you might want to use filtered water for a better taste.
4) How to Make Dutch Oven No Knead Bread
step 1. Whisk the dry ingredients together in a large bowl. You want to disperse the salt and yeast evenly through the flour so you do not get salty pockets. Pour in the water and mix it with a wooden spoon or your hand. It will look rough and shaggy. That is perfect. Do not try to make it smooth. Cover the bowl with plastic wrap and let it sit on the counter for 12 to 18 hours. I do this right before I go to bed.
step 2. When you are ready to bake, put your empty pot into the oven and preheat it to 450 degrees. Let the pot heat up for 30 minutes. This step is non negotiable. The hot enameled cookware acts like a kiln, blasting the dough with heat the moment it touches the surface. While the pot heats, scrape the dough onto a floured surface. It will be sticky. Gently fold the edges in to make a round shape.
step 3. Carefully take the hot pot out of the oven. Use heavy duty mitts because it will be scorching hot. Drop the dough into the pot. I like to put the dough on a piece of parchment paper first and lower it in like a sling. This prevents me from burning my knuckles. Put the lid on and bake for 30 minutes. The lid traps steam from the dough which helps the crust form.
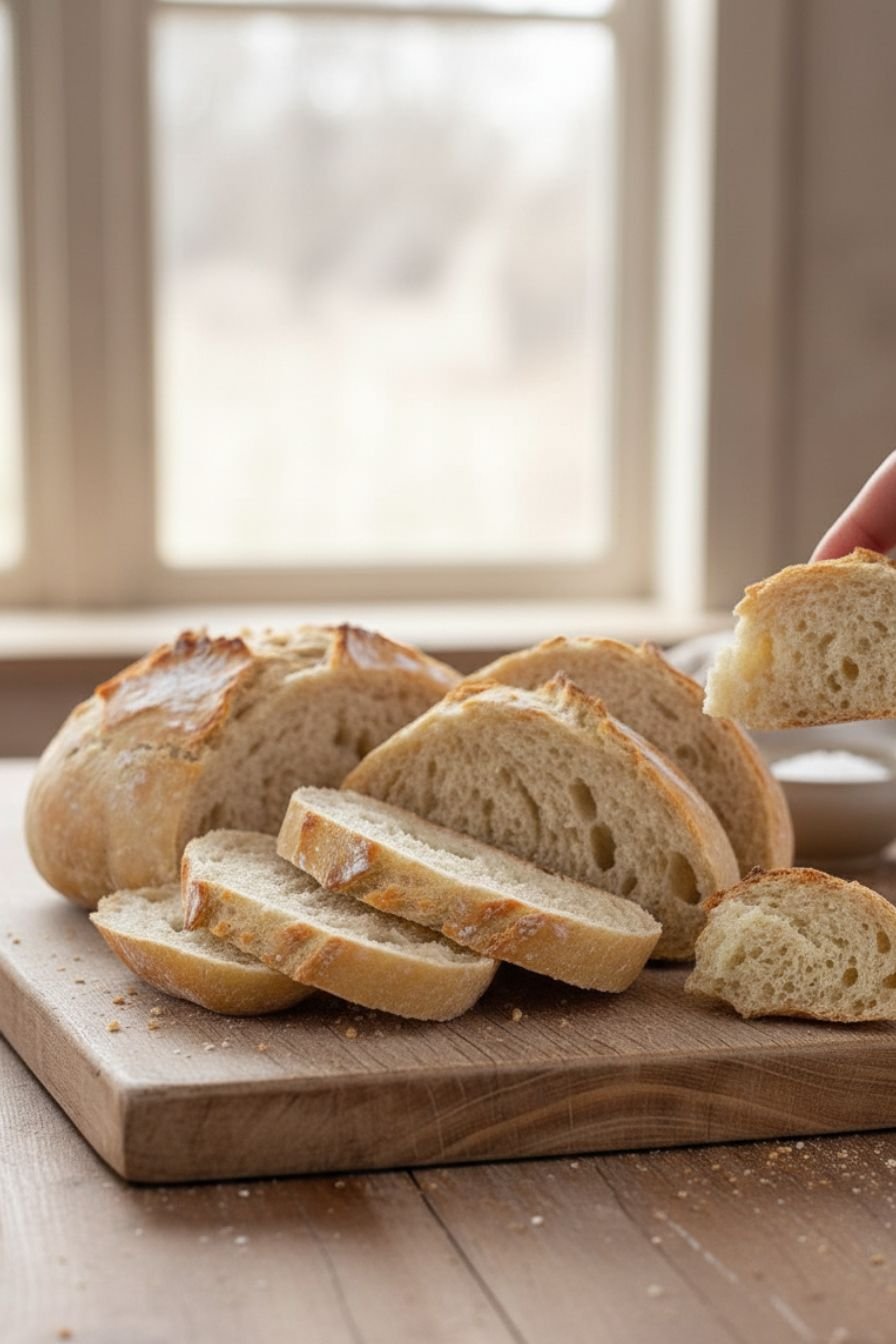
step 4. Remove the lid and bake for another 15 minutes. This is when the crust turns deep golden brown and gets crispy. Tap the bread. It should sound hollow like a drum. Take it out and let it cool on a rack. Waiting for it to cool is the hardest part, but if you cut it too soon, the inside might be gummy.
5) Tips for Making Dutch Oven No Knead Bread
Use Parchment Paper. The first time I made this, I dropped the dough directly into the pot. It did not stick, but I was terrified of burning my arms. Now I build a little sling out of parchment paper. I put the dough on the paper and lift the whole thing into the pot. It makes transfer safe and easy. Plus, it makes lifting the baked bread out a breeze.
Check Your Pot Knob. Not all pot knobs are oven safe at high temperatures. Some black plastic knobs can melt at 450 degrees. Check your manufacturer instructions. If you are unsure, unscrew the knob and plug the hole with a little foil, or buy a metal replacement knob. I ruined a good lid once by ignoring this rule.
Let It Cool Completely. I know the smell of fresh bread is intoxicating. You want to slice it immediately and slather it with butter. But bread continues to cook as it cools. The steam inside needs to settle. If you cut it hot, the starch molecules clump together and the texture gets doughy. Give it at least 30 minutes to finish its heavy bottomed pot cooking process.
6) Making Dutch Oven No Knead Bread Ahead of Time
The beauty of this recipe is that it is designed to be made ahead. You have to start it the day before you want to eat it. The long fermentation develops flavor that you just cannot get in a quick loaf. I usually mix the dough on Friday night so we can have fresh bread for Saturday dinner.
If you are not ready to bake after 18 hours, you can put the bowl in the fridge. The cold slows down the yeast activity. You can leave it there for another day or two. When you want to bake, just take it out and let it warm up a bit while the oven preheats. It is very flexible.
You can also bake the bread and freeze it. Once the loaf is fully cooled, wrap it tightly in foil and then place it in a freezer bag. It freezes beautifully for up to three months. To eat, just thaw it on the counter and warm it in the oven to crisp up the crust again.
7) Storing Leftover Dutch Oven No Knead Bread
Crusty bread is best the day it is made, but leftovers are still great. Do not store this bread in a plastic bag. Plastic traps moisture and will turn your lovely crispy crust soft and rubbery. Instead, store it cut side down on a cutting board or keep it in a paper bag. This allows the crust to breathe while protecting the inside.
If the bread does get a little stale after a couple of days, it makes the best toast in the world. I love slicing it thick and toasting it for breakfast. It also makes incredible croutons or French toast. Nothing goes to waste in my kitchen. You can simply revive the crust by popping the whole loaf in a hot oven for five minutes.
For longer storage, slicing the bread before freezing is a smart move. This way, you can grab just a slice or two for toast without having to thaw the entire loaf. It is a great way to have homemade bread on hand for busy weekday mornings.

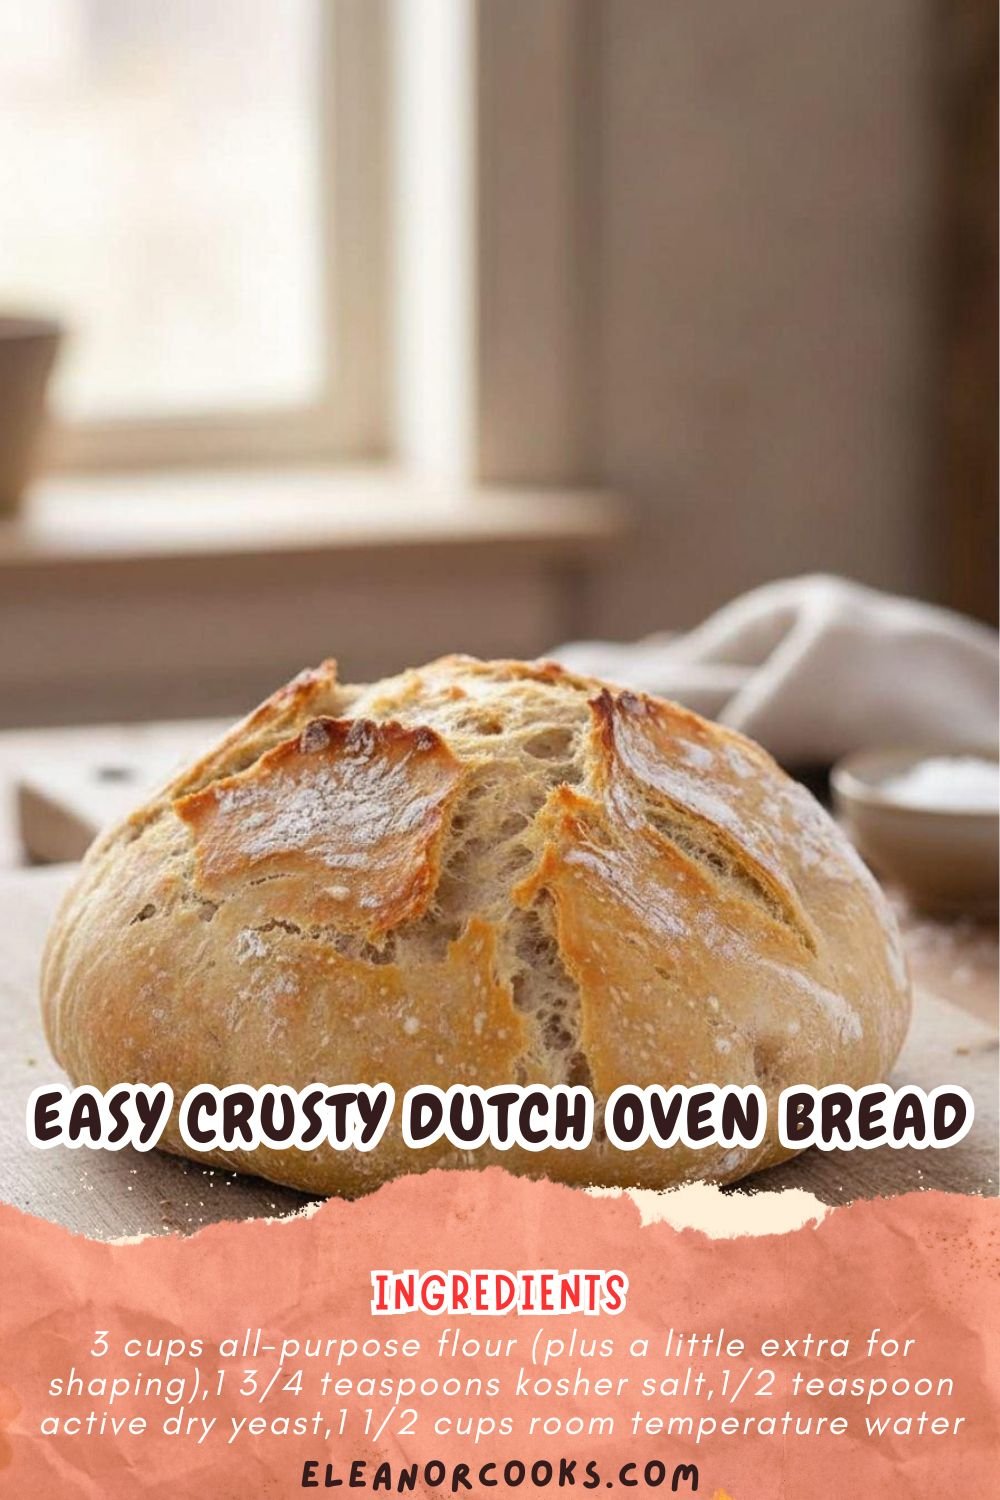
Easy Dutch Oven Recipes: Crusty No-Knead Bread
Ingredients
For the Dough
- 3 cups all-purpose flour (plus a little extra for shaping)
- 1 3/4 teaspoons kosher salt
- 1/2 teaspoon active dry yeast
- 1 1/2 cups room temperature water
Instructions
The Prep
- Whisk the flour, salt, and yeast together in a large bowl. I like to use a whisk to make sure the yeast doesn’t get clumped in one spot.
- Pour in the water. Use a wooden spoon or your hands (my preference) to mix it until it looks like a shaggy, sticky mess. Do not overthink this. If it looks dry, add a splash more water.
- Cover the bowl tightly with plastic wrap. Let it sit on your counter for 12 to 18 hours. I usually do this right before bed so I wake up to dough that is bubbly and ready.
- When you are ready to bake, put your empty Dutch oven (lid and all) into the oven. Preheat the oven to 450°F (230°C). Let the pot heat up for at least 30 minutes. This is the secret to that crispy crust.
The Bake
- While the pot heats, dump your dough onto a well-floured surface. It will be sticky, so flour your hands too. Gently shape it into a loose ball. No need to knead it hard, just tuck the ends under.
- Carefully remove the hot pot from the oven. This is the scary part, so please use good oven mitts. Drop the dough ball into the hot pot. I sometimes put the dough on parchment paper first and lower the whole thing in to avoid burning my knuckles.
- Put the lid back on and bake for 30 minutes. The steam trapped inside is working its magic right now.
- Remove the lid and bake for another 15 minutes. This is when the crust turns that gorgeous golden brown. Tap the loaf; if it sounds hollow, it is done.
- Let it cool on a rack before slicing. I know it is tempting to cut it hot, but the texture is better if you wait.
10) Nutrition
Serving Size: 1 slice | Calories: 120 | Sugar: 0 g | Sodium: 290 mg | Fat: 0 g | Carbs: 25 g | Protein: 4 g


Leave a Comment