
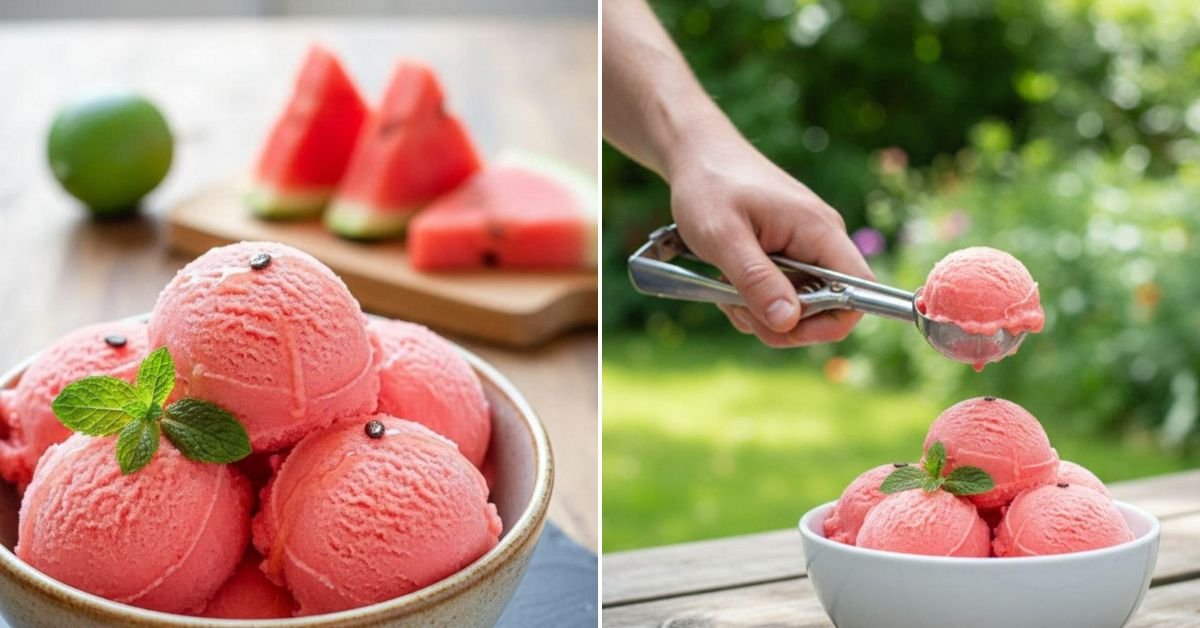
I have this childhood memory of my grandpa telling me our backyard watermelons were ‘summer moonshine’ – pure, sweet, and capable of putting a big, happy smile on your face. I always thought he was being silly, but now I get it. This Watermelon Moonshine Recipe captures exactly that. It’s pure, sun-ripened watermelon, spun into the most refreshing sorbet you can imagine. Let’s be honest. When the heat hits, the last thing I want to do is cook. I want something cold, simple, and bursting with real fruit flavor. Forget the fussy desserts. This is it. Just a few ingredients, no fancy ice cream maker needed, and you get a treat that feels like a cool breeze on a hot day. We love this because it’s our go-to fix for a sweet tooth without any guilt. It’s dairy-free, naturally sweet, and so much better than anything from a tub. If you’re tired of the same old watermelon recipes, or you’ve got a giant melon staring you down, this is the perfect solution. It’s simpler than a watermelon cake, more grown-up than watermelon popsicles, and more satisfying than just a glass of watermelon juice. You’ll never look at that big green fruit the same way again.

Table of Contents
- 1) Key Takeaways
- 2) Easy No-Churn Watermelon Sorbet Recipe
- 3) Ingredients for No-Churn Watermelon Sorbet
- 4) How to Make No-Churn Watermelon Sorbet
- 5) Tips for Making No-Churn Watermelon Sorbet
- 6) Making No-Churn Watermelon Sorbet Ahead of Time
- 7) Storing Leftover Watermelon Sorbet
- 8) Try these Desserts next!
- 9) No-Churn Watermelon Sorbet
- 10) Nutrition
1) Key Takeaways
- No ice cream maker? No problem! This easy Watermelon Moonshine Recipe uses a simple freeze-and-stir method.
- Just three core ingredients, plus a pinch of salt. Let the sweet watermelon flavor shine.
- The secret to creamy texture? Patience and a fork. Stirring as it freezes is everything.
- Perfect for using up a ripe watermelon. Turn leftover fruit into a stunning dessert.
2) Easy No-Churn Watermelon Sorbet Recipe
I’m going to let you in on a little secret. You don’t need any fancy gadgets to make fantastic sorbet at home. This is my go-to method when I want something cold, clean, and undeniably refreshing. It’s the simplest recipe I know. The whole point is to let the watermelon be the star.
Think about it. You get a watermelon home, slice into it, and that first sweet, crisp bite is pure summer. But let’s be real, sometimes you get a big one and there’s just… so much. This Watermelon Moonshine Recipe is the answer. It captures that initial juicy perfection and turns it into a frozen treat you can savor for days.
It’s quicker than baking a watermelon cake (no oven heat!), more sophisticated than basic watermelon popsicles, and gives you way more control than just a glass of watermelon juice. This recipe is about celebrating the fruit itself. You can taste the sunshine in every spoonful.

3) Ingredients for No-Churn Watermelon Sorbet
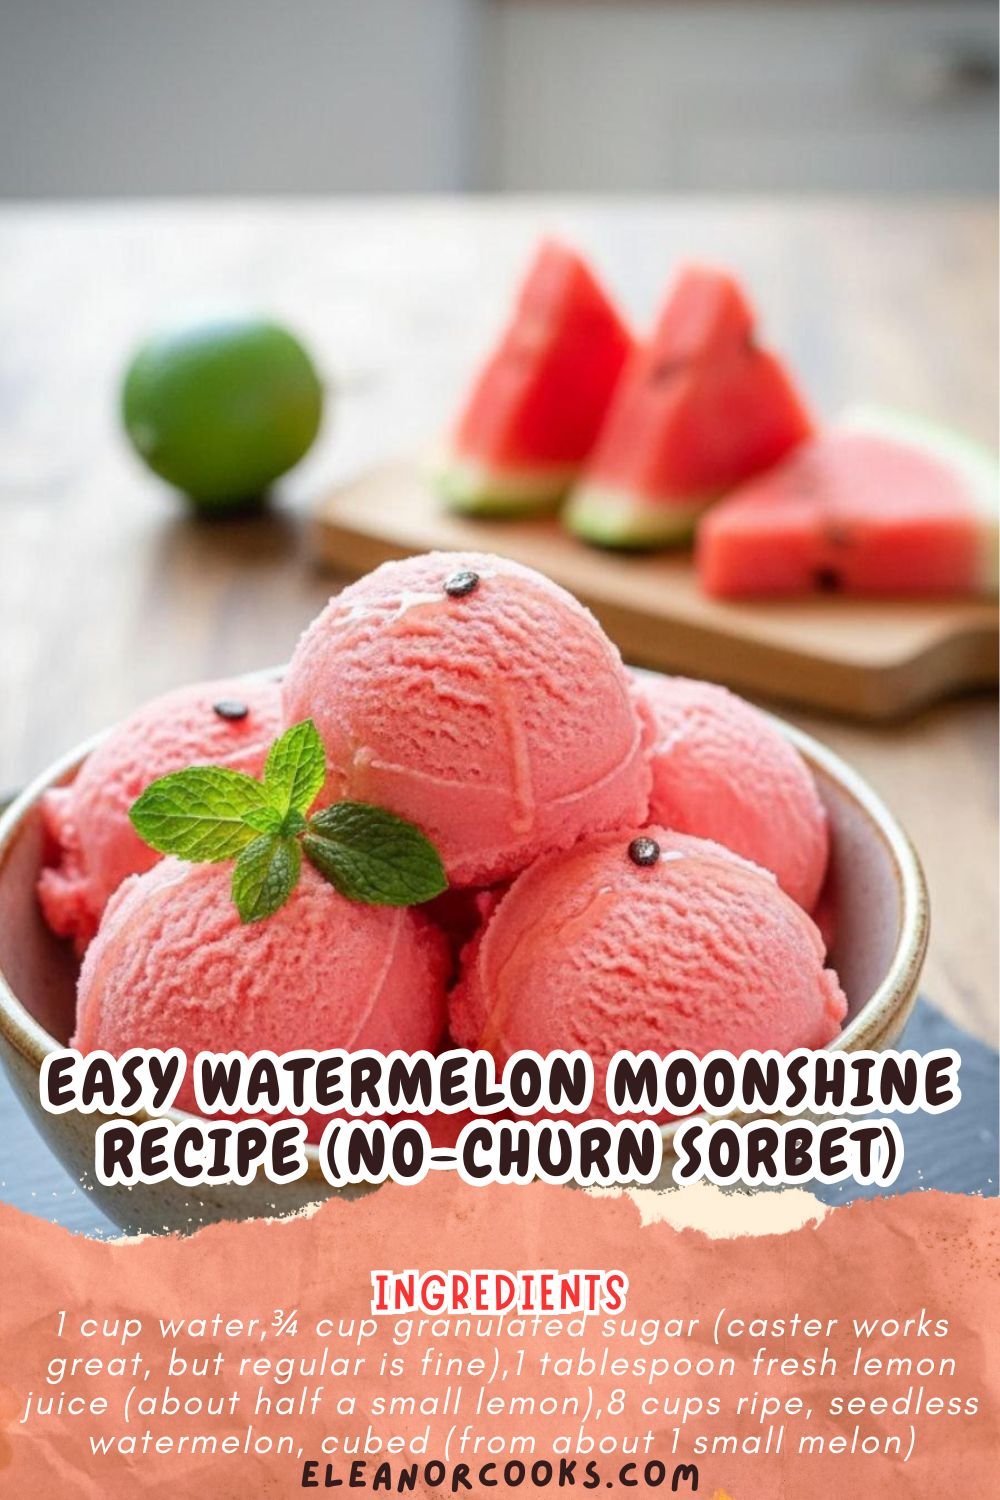
Ripe, Seedless Watermelon: This is non-negotiable. The sorbet will only taste as good as the melon you start with. Look for one that feels heavy for its size and has a creamy yellow spot on one side. The flesh should be a deep pink or red. About 8 cups of cubes will do.
Granulated Sugar: We’re making a light simple syrup. The sugar doesn’t just add sweetness; it lowers the freezing point, preventing the sorbet from turning into a solid, flavorless ice block. About 3/4 of a cup is usually perfect to balance the natural fruit sugars.
Fresh Lemon Juice: Just a tablespoon. It’s the magic trick you can’t see. The lemon’s acidity makes the watermelon flavor taste brighter and more like itself. It cuts through the sweetness without making the sorbet tart. Squeeze it fresh—it makes a difference.
A Pinch of Salt: Don’t skip this. I know it sounds weird. But a tiny bit of salt is like turning up the volume on all the other flavors. It makes the sweetness pop and rounds everything out beautifully. We’re talking a literal two-finger pinch.
4) How to Make No-Churn Watermelon Sorbet
Step 1: Make the Syrup. Grab a small saucepan. Combine a cup of water, the sugar, and the lemon juice. Heat it over medium-low, stirring occasionally, until all the sugar crystals dissolve. You don’t need a rolling boil. Just get it clear. Take it off the heat and let it cool completely. I sometimes set the pot in a bowl of ice water to speed things up if I’m impatient.
Step 2: Prep the Watermelon. While the syrup cools, cube your watermelon. Discard the rind. Toss all those gorgeous pink cubes into a blender. Puree until it’s completely smooth and liquid. You’ll know it’s ready when the kitchen smells like a summer picnic. If you want an ultra-smooth sorbet, you can strain this puree through a fine-mesh sieve, but it’s not mandatory.
Step 3: Combine & Chill. In a large bowl, whisk together the cooled syrup, the watermelon juice, and your pinch of salt. The syrup must be cool. If it’s warm, it’ll start melting the sorbet mixture before it even freezes. Give it a good stir. Cover the bowl and pop it in the fridge for about an hour. This just helps everything get nice and cold before the freezing stage.
Step 4: The Freeze & Stir. Pour the cold mixture into a metal 9×13 inch pan or any shallow, freezer-safe dish. The shallower the pan, the faster and more evenly it freezes. Place it, uncovered, flat in the freezer. Set a timer for 45 minutes. When it goes off, take the pan out. You’ll see icy edges forming. Grab a sturdy fork or a whisk and stir vigorously, breaking up all the ice crystals and mixing the frozen edges into the slushy center. This is the whole secret to a creamy texture. Return to the freezer.
Step 5: Repeat & Finish. Set your timer for 30 minutes. Repeat the stirring process. Do this 3-4 more times, every 30 minutes. You’ll watch the transformation from a slushy drink to a thick, scoopable, perfect watermelon moonshine sorbet. It usually takes me about 3 to 4 hours total. When it’s firm enough to hold a scoop shape but still yields, you’re done. For a firmer texture, you can pack it into a container and freeze it for another hour.
5) Tips for Making No-Churn Watermelon Sorbet
Choosing your watermelon is 90% of the battle. If your melon tastes bland, your sorbet will taste bland. There’s no hiding it. Don’t just look at the color. Give it a thump—it should sound deep and hollow. Heft it—it should feel surprisingly heavy for its size. That yellow spot? That’s where it sat on the ground and ripened in the sun. A creamy yellow is what you want.
The stirring is non-negotiable. I get it, it’s a bit of a chore. But if you skip it, you’ll get a rock-hard pink ice block. Stirring incorporates tiny air bubbles, which gives the sorbet that light, almost creamy mouthfeel. It also breaks up the large ice crystals that make things grainy. Think of it as your arm workout for dessert. It’s worth it.
Don’t rush the syrup cooling. Impatience is the enemy here. If you pour warm syrup into the cold watermelon juice, you’ll just have to chill the whole mixture longer anyway. Let the syrup cool to at least room temperature. If you’re in a real hurry, pour it into a wide metal bowl and stir it over an ice bath. But honestly, just plan ahead a little.
6) Making No-Churn Watermelon Sorbet Ahead of Time
This sorbet is actually a fantastic make-ahead dessert. The full, active prep time is maybe 20 minutes, but the freezing process takes a few hours. This makes it perfect for starting in the early afternoon for an evening barbecue. You can do all your stirring, then let it firm up in the freezer until your guests arrive.
Once it’s fully set, you can store it in an airtight container for up to two weeks. The flavor stays bright and wonderful. The texture might harden a bit more over time. That’s okay. Just take the container out of the freezer and let it sit on your counter for 5-10 minutes before you try to scoop it. It’ll soften right up.
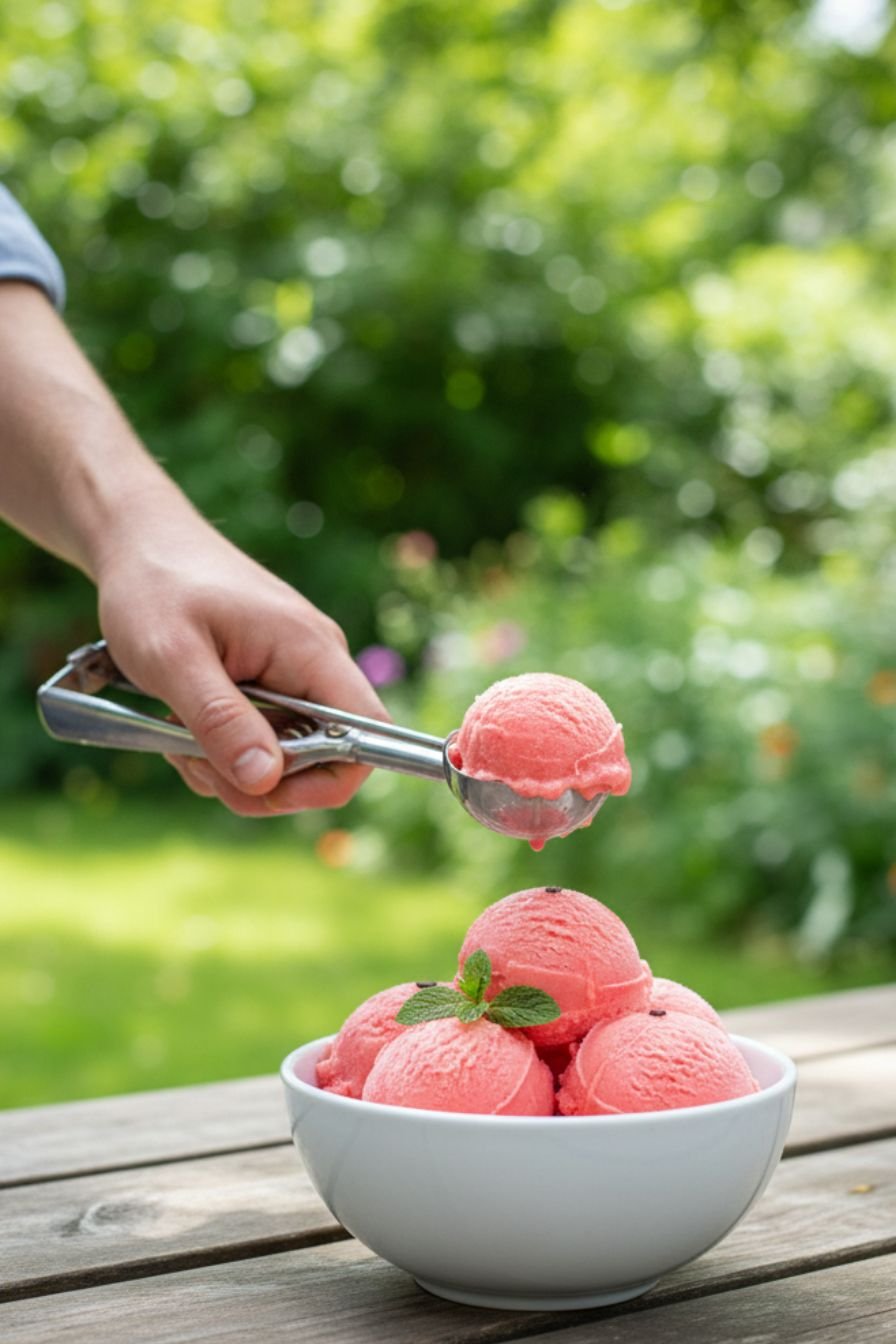
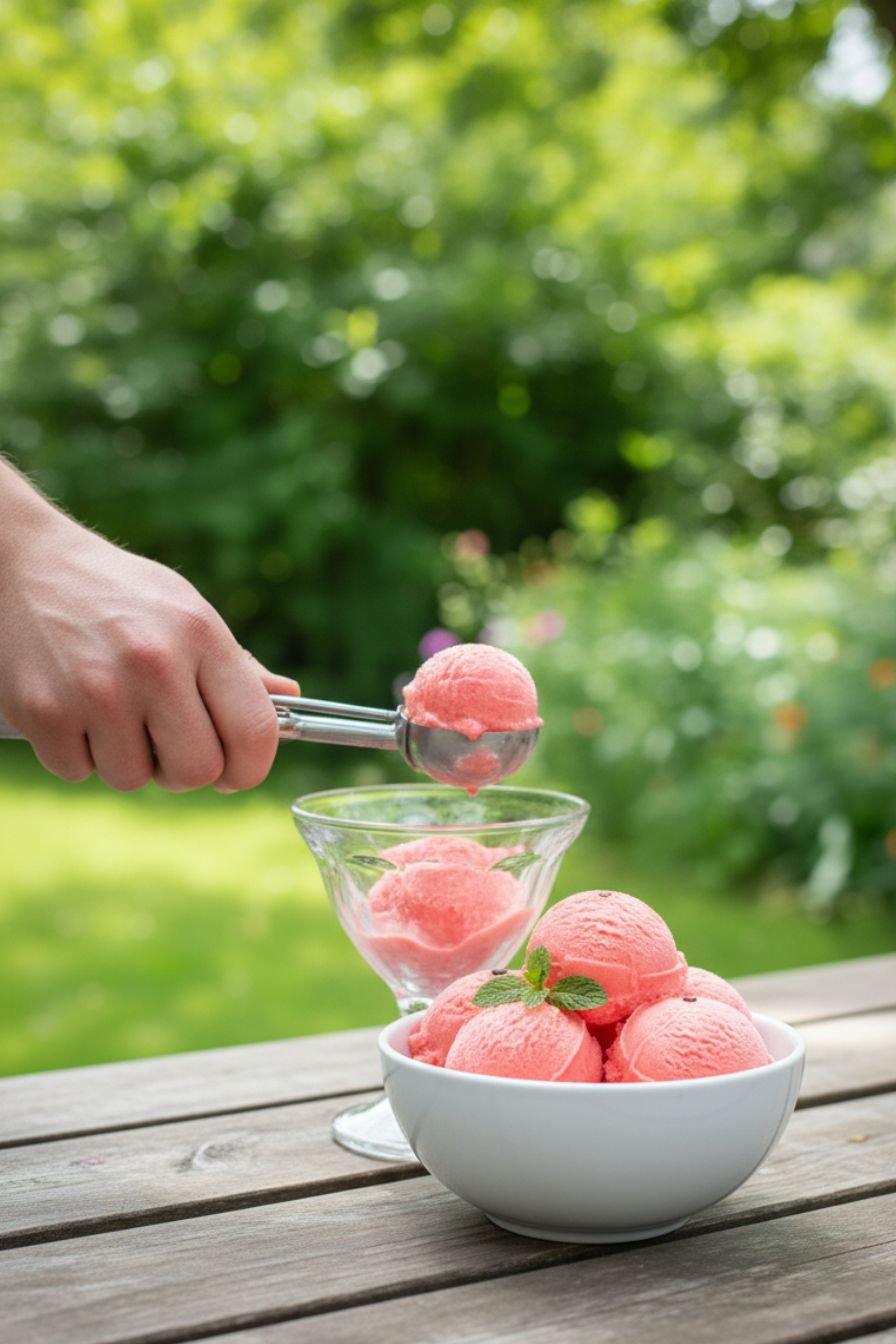
If you’re planning a party, consider making a double batch. It’s so light and refreshing that people often go back for seconds. Having extra means you won’t be scraping the bottom of the pan. Plus, it looks beautiful served in a clear glass bowl. A little fresh mint on top makes it feel extra special.
7) Storing Leftover Watermelon Sorbet
Transfer any leftover sorbet to a container with a tight-fitting lid. Press a piece of parchment paper directly onto the surface of the sorbet before sealing. This simple step prevents ice crystals from forming on top, which is the main culprit for that “freezer taste” and grainy texture over time.
Kept this way, your homemade watermelon sorbet will stay in great shape for about two weeks. Honestly, it’s usually gone long before then in my house. If it does get very hard, don’t force your scoop and risk bending it. Just give the container more time on the counter to temper.
One more storage tip: try to keep it in the main part of the freezer, not crammed in the door. The temperature fluctuates every time you open it, which isn’t great for maintaining that perfect texture. A little planning with your freezer space goes a long way.
8) Try these Desserts next!


9) No-Churn Watermelon Sorbet

Easy Watermelon Moonshine Recipe: Our Favorite Summer Sorbet
Ingredients
For the Simple Syrup
- 1 cup water
- ¾ cup granulated sugar (caster works great, but regular is fine)
- 1 tablespoon fresh lemon juice (about half a small lemon)
For the Sorbet
- 8 cups ripe, seedless watermelon, cubed (from about 1 small melon)
- A tiny pinch of salt (trust me on this)
Instructions
Make the Syrup
- Grab a small saucepan. Toss in the water, sugar, and lemon juice. Heat it over medium-low, stirring now and then, just until all the sugar dissolves. No need to boil it to death – we’re not making candy. Once it’s clear, take it off the heat and let it cool completely. I sometimes pop the pan in the fridge to speed things up.
Prep the Star Ingredient
- While the syrup cools, tackle the watermelon. Now, if you’re wondering how to cut a watermelon easily, I just quarter it, slice off the rind, and chop the red flesh into chunks. Toss those juicy cubes into a blender or food processor. Blitz it until it’s completely smooth and liquid. It should smell absolutely incredible.
Strain (Optional, But Worth It)
- This step is optional, but if you want that super smooth, professional texture, pour your watermelon puree through a fine-mesh sieve into a large bowl. It catches the little pulp bits and gives you the silkiest base. If you don’t mind a bit of texture, you can skip it – I won’t tell.
Bring It All Together
- By now, your syrup should be cool. If it’s even a little warm, it’ll start melting the sorbet later, so patience is key. Stir the cooled syrup and that tiny pinch of salt into the watermelon juice. The salt isn’t to make it salty; it just makes all the sweet flavors pop. Give it a good whisk so everything is friends.
The Freeze & Stir Method (No Machine Needed)
- Pour your beautiful pink mixture into a 9×13 inch metal baking pan or a shallow, freezer-safe container. The shallower it is, the faster it freezes. Pop it, uncovered, into the freezer. Set a timer for 45 minutes. When the timer goes off, take it out. You’ll see it’s starting to freeze around the edges. Grab a fork or a whisk and stir it all up, breaking up the icy bits and pulling the liquid center to the edges. This is the secret! It incorporates air and prevents a solid block of ice. Put it back. Repeat this stir-and-freeze process every 30-45 minutes for the next 3-4 hours. It usually takes me 4 rounds. You’ll watch it go from a slushy to a thick, scoopable sorbet. When it’s firm but still yields to a spoon, you’re done.
Scoop & Serve
- Scoop your homemade watermelon moonshine into bowls or cones. I love a garnish of fresh mint or a tiny sprinkle of lime zest. For an adult twist, a splash of vodka or white rum in the mix before freezing makes a fantastic granita-style treat.
10) Nutrition
Serving Size: 1/6 of recipe | Calories: 120 | Sugar: 28g | Sodium: 10mg | Fat: 0g | Saturated Fat: 0g | Carbohydrates: 31g | Fiber: 1g | Protein: 1g | Cholesterol: 0mg


Leave a Comment