
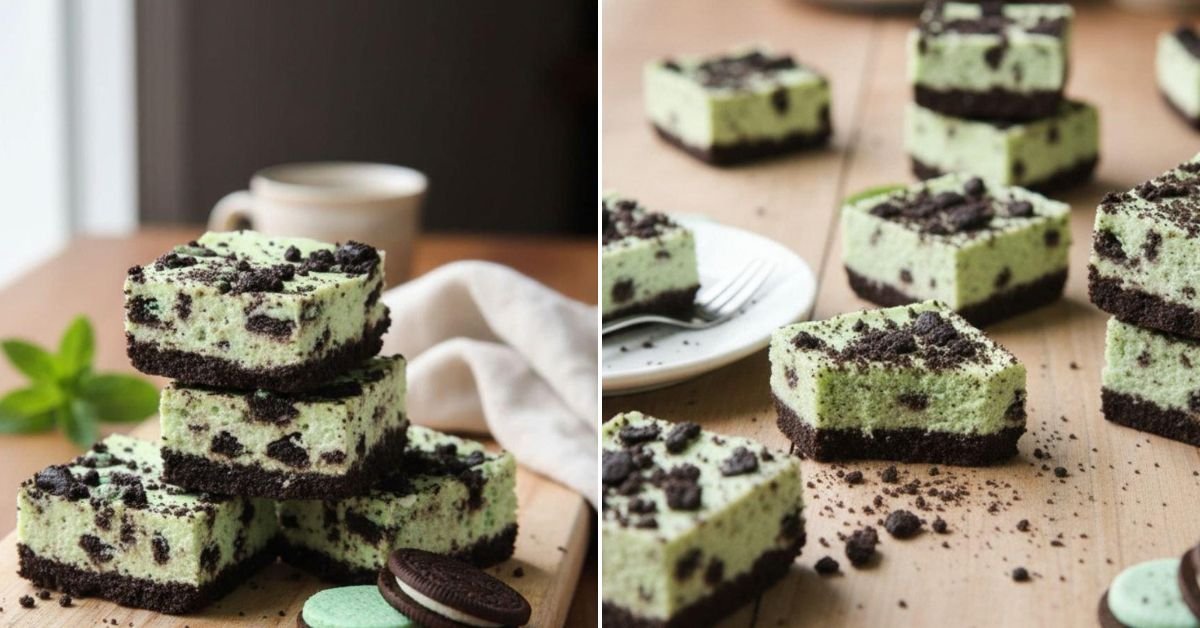
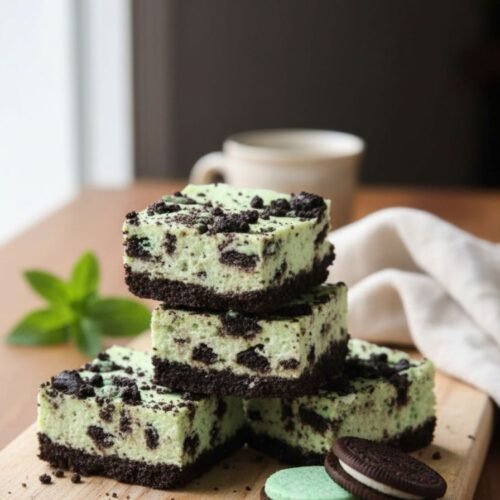
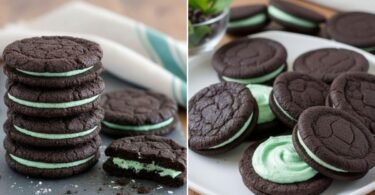
Let’s talk about a win. A few weeks ago, my nephew’s eyes went wide when I pulled these minty green beauties out of the fridge. He thought I’d slaved over a hot oven. I let him believe it for a solid minute before confessing my secret: this homemade cheesecake is a total no-bake miracle. Honestly, it’s the dessert equivalent of a magic trick. You crush some cookies, whip up a creamy filling that tastes way fancier than it has any right to, and then just… let the fridge do all the work. The hardest part is not eating all the Oreos while you’re crushing them for the crust. (Pro tip: buy a second pack to snack on. You’re welcome.) Look, I’ve gone down the rabbit hole of healthy cheesecake recipes, vegan cheesecake recipes, and even raw vegan cheesecake. Sometimes you just need the real, creamy, indulgent deal. This isn’t a high protein cheesecake or a pumpkin cheesecake recipe. This is your go-to mint dessert recipe for when you need something impressive with minimal effort. It never fails to make people think you’re a pastry genius. We can keep the ‘no-bake’ part our little secret.
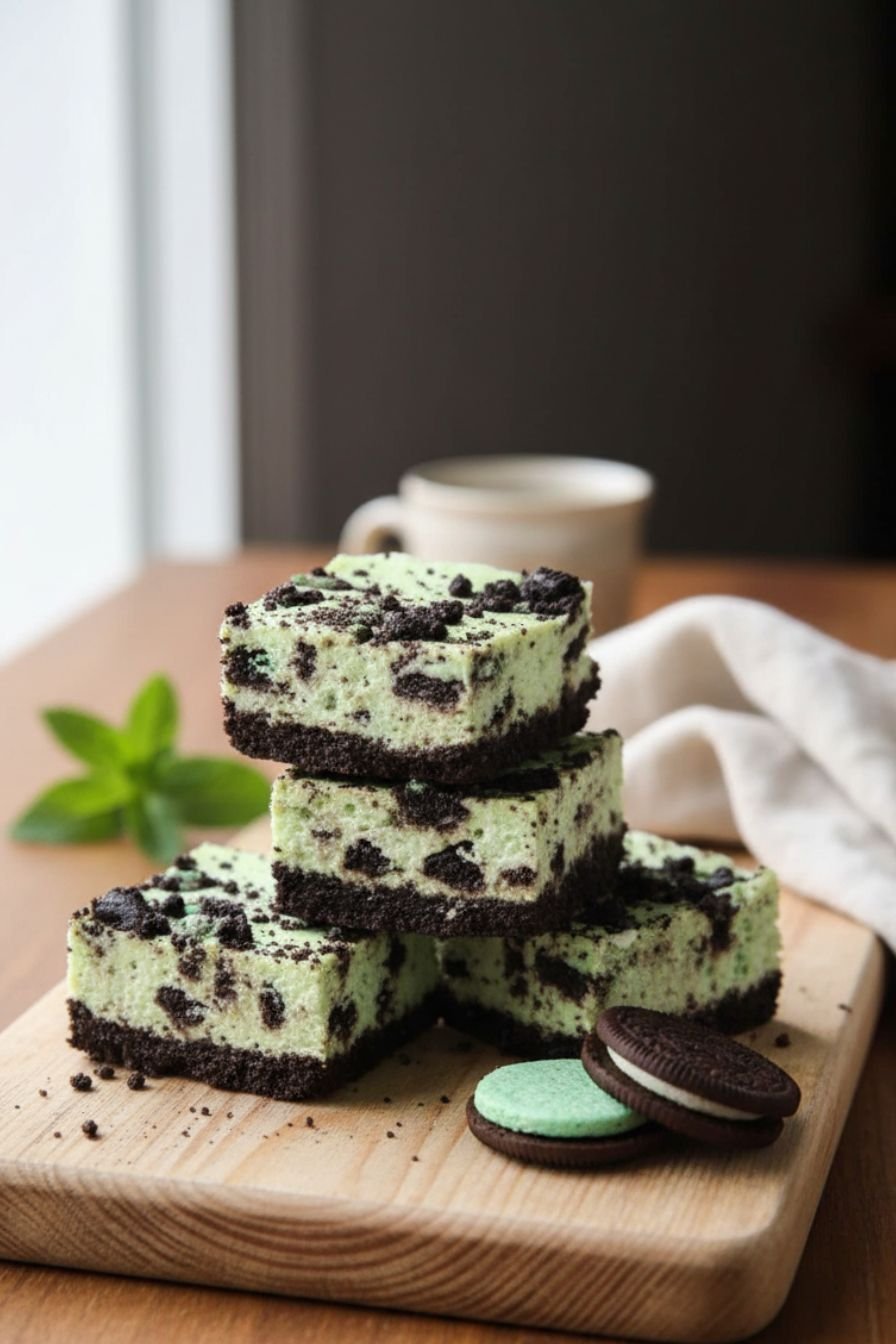
Table of Contents
- 1) Key Takeaways
- 2) Easy My Shockingly Easy Mint Oreo Cheesecake Bars Recipe
- 3) Ingredients for My Shockingly Easy Mint Oreo Cheesecake Bars
- 4) How to Make My Shockingly Easy Mint Oreo Cheesecake Bars
- 5) Tips for Making My Shockingly Easy Mint Oreo Cheesecake Bars
- 6) Making My Shockingly Easy Mint Oreo Cheesecake Bars Ahead of Time
- 7) Storing Leftover My Shockingly Easy Mint Oreo Cheesecake Bars
- 8) Try these Dessert next!
- 9) My Shockingly Easy Mint Oreo Cheesecake Bars
- 10) Nutrition
1) Key Takeaways
Why will you love these bars? Let’s count the ways. They require zero baking, which means your kitchen stays cool and you don’t have to babysit an oven. The whole process from cookie-crushing to chilling takes about half an hour of active work.
Who says homemade cheesecake has to be complicated? This version swaps a water bath and a springform pan for a simple square dish and your fridge. The texture is luxuriously creamy, not dense, thanks to folding in freshly whipped cream.

What about flavor? It’s a perfect harmony of rich, tangy cream cheese and cool, refreshing mint, all anchored by that iconic chocolate Oreo crust. It’s the kind of dessert that makes people ask for the recipe before they’ve even finished their piece.
2) Easy My Shockingly Easy Mint Oreo Cheesecake Bars Recipe
I have a confession. The first time I made a homemade cheesecake from scratch, I was so proud. I also spent the next hour cleaning melted butter off the bottom of my oven. That’s when I decided there had to be a better way. These no-bake bars are that better way. They deliver all the satisfaction of a classic cheesecake without any of the stressful, crack-prone baking.
Think of it as your kitchen shortcut to dessert glory. You get that signature creamy cheesecake texture by letting the fridge do the firming work, not the heat of an oven. It’s foolproof. If you can crush cookies and whip cream, you’ve mastered this recipe. It’s perfect for hot summer days, last-minute potlucks, or anytime you crave something impressive without the impressive effort.
This recipe is my go-to mint dessert recipe. It captures that nostalgic, cool mint flavor we all love, paired with chocolate in the most satisfying way. It feels special, like you fussed for hours, but the secret is all in the chilling time. For anyone searching for easy healthy cheesecake recipes or vegan cheesecake recipes, this might not fit the bill, but for a classic, indulgent treat, it’s absolutely perfect.
3) Ingredients for My Shockingly Easy Mint Oreo Cheesecake Bars
Mint Oreo Cookies: You’ll need one standard package. We use the whole cookie, cream filling and all, for the crust. That filling acts as a built-in sweetener and binder, so we need less added butter. It’s a brilliant little hack.
Unsalted Butter, Melted: Just five tablespoons to help the crust crumbs cling together. Using unsalted lets you control the salt level, but if salted is all you have, just use it. The world won’t end, promise.
Full-Fat Cream Cheese: Please, for the love of a smooth filling, use the blocks of full-fat cream cheese, not the spreadable kind in a tub. Let it sit on the counter until it’s genuinely soft. This is non-negotiable for getting rid of lumps.
Granulated Sugar: A half cup sweetens the filling just right. It balances the tang of the cream cheese without making the bars overly sweet.
Pure Vanilla & Peppermint Extracts: Vanilla adds a warm base note. The peppermint extract is where the magic happens. Start with half a teaspoon—you can always add more. A little goes a long way.
Green Food Coloring Gel (Optional): This is purely for fun. A single tiny drop of gel coloring gives that perfect, pale minty green hue. Liquid food coloring can thin the filling, so gel is best.
Heavy Whipping Cream: Make sure it’s cold. Whipping it to stiff peaks is what gives the filling its light, mousse-like texture instead of a dense, heavy one. It’s the secret to a great no-bake cheesecake.
4) How to Make My Shockingly Easy Mint Oreo Cheesecake Bars
Step 1. Prep the Pan. Line an 8×8 or 9×9 inch square baking pan with parchment paper, letting two sides hang over like handles. This little trick is your future self’s best friend for lifting out pristine bars. Trust me on this.
Step 2. Make the Crust. Toss all the Oreos into a food processor and blitz them into fine crumbs. No processor? A sturdy zip-top bag and a rolling pin (or a heavy can) works just fine. Pour the crumbs into a bowl, drizzle with the melted butter, and mix until it looks like dark, wet sand. Press this firmly into your prepared pan. I use the bottom of a flat glass to get it nice and even. Pop it in the fridge to set.
Step 3. Whip the Filling. In a large bowl, beat the softened cream cheese with an electric mixer until it’s completely smooth and creamy. No lumps allowed. Beat in the sugar, vanilla, and peppermint extract. In a separate, clean bowl, whip the cold heavy cream until you get stiff peaks. It should hold its shape when you lift the beaters.
Step 4. Combine Gently. This is the only slightly fancy part. Add about a third of the whipped cream to the cream cheese mixture. Use a spatula to gently fold it in until no white streaks remain. This lightens the base. Now, fold in the rest of the whipped cream just until everything is combined. Be gentle—you want to keep that airy texture.
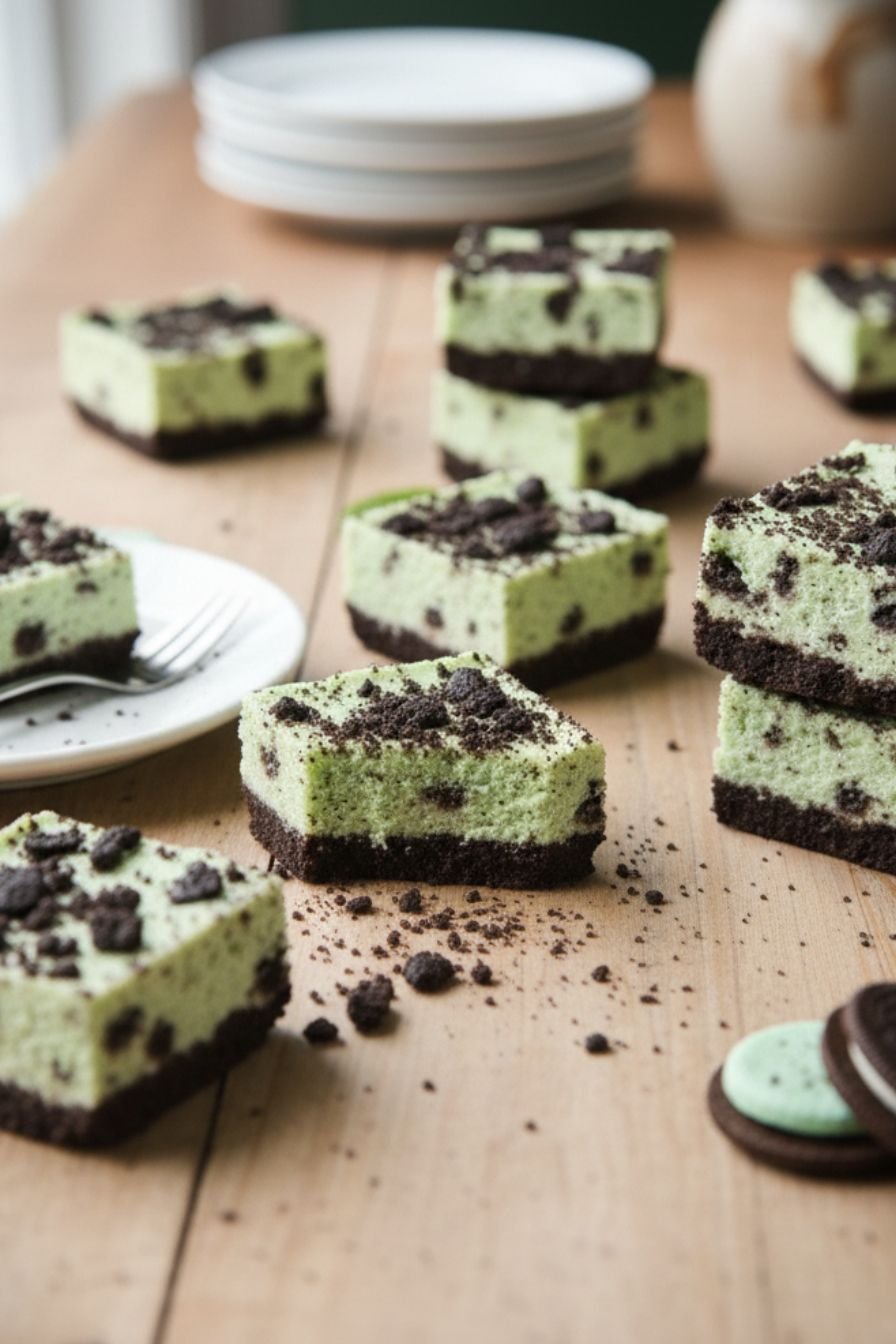
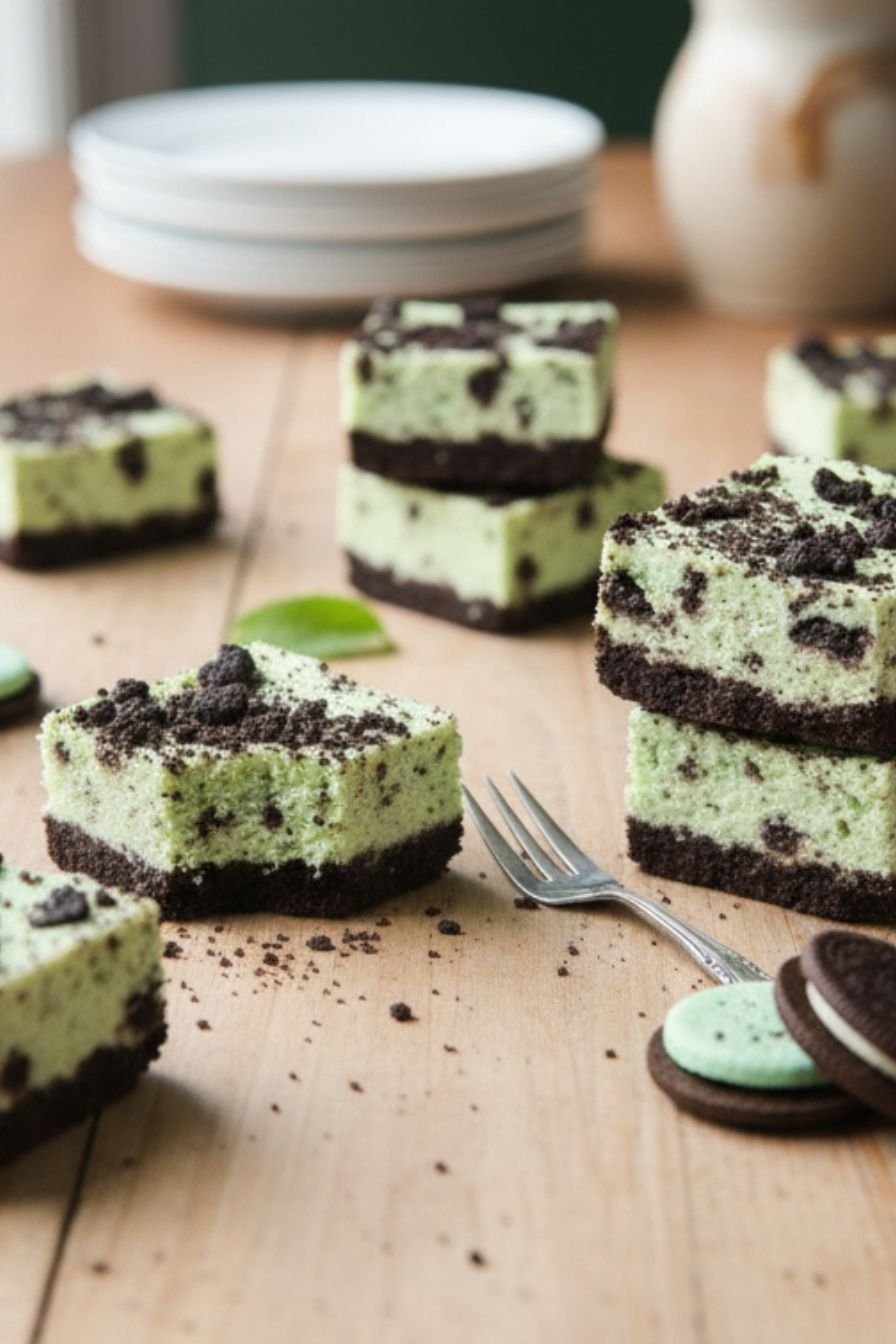
Step 5. Assemble and Chill. Pour the fluffy mint filling over your chilled crust. Smooth the top. Sprinkle with the chopped Oreo pieces, pressing them in lightly. Cover the pan tightly with plastic wrap. Now, walk away. Let it chill in the fridge for at least 6 hours, but overnight is ideal. This patience is what gives you perfect, clean slices.
5) Tips for Making My Shockingly Easy Mint Oreo Cheesecake Bars
Soft cream cheese is your number one priority. If you forget to take it out of the fridge, you can microwave the unopened blocks for 10-15 seconds on low power. You want it soft, not melted and oily. Lumpy filling starts with cold cream cheese.
When whipping the cream, make sure your bowl and beaters are clean and cold. Any trace of grease can prevent the cream from whipping up properly. If you’re in a warm kitchen, chilling the bowl for 10 minutes first can really help. Whip it just until stiff peaks form; over-whipping leads to butter.
The folding step is key. Use a large spatula and a gentle hand. Cut down through the center, sweep along the bottom, and fold over the top. Rotate the bowl as you go. You’re not stirring; you’re incorporating. Stop as soon as the last streak of white disappears for the lightest texture.
6) Making My Shockingly Easy Mint Oreo Cheesecake Bars Ahead of Time
This dessert is practically designed for making ahead. In fact, I think it tastes better after a full 24 hours in the fridge. The flavors have more time to meld, and the texture becomes perfectly set and sliceable.
You can assemble the bars completely up to two days before you need them. Just keep them covered tightly in the pan in the fridge. If you want to get really organized, you can even make and press the crust into the pan a day ahead, cover it, and leave it in the fridge. Then the filling comes together quickly the next day.
For parties, I often slice the whole block into bars a few hours before serving. I arrange them on a platter, cover it loosely, and pop it back in the fridge. This way, when guests arrive, dessert is ready to go, looking perfect and no last-minute knife work is needed.
7) Storing Leftover My Shockingly Easy Mint Oreo Cheesecake Bars
Leftovers? A rare occurrence in my house, but it happens. Store any leftover bars in an airtight container in the refrigerator. They’ll keep their fantastic texture and flavor for up to 4 days. The crust might soften just a touch at the very bottom by day four, but it’s still delicious.
You can also freeze these bars for a future treat. Place the sliced bars in a single layer on a parchment-lined baking sheet and freeze until solid, about 2 hours. Then, transfer them to a freezer-safe bag or container. They’ll keep for up to 2 months. Thaw individual bars in the fridge for a few hours before serving.
One note on storage: if your fridge has strong odors, make sure the container is sealed well. Cream cheese can pick up other flavors. A good snap-top container is your best bet for keeping the mint flavor pure and fresh.
8) Try these Dessert next!


9) My Shockingly Easy Mint Oreo Cheesecake Bars
Homemade Cheesecake: Mint Oreo No-Bake Bars
Ingredients
For the Crust
- 1 (14.3 oz) package Mint Oreo cookies (about 36 cookies)
- 5 tablespoons unsalted butter, melted (if you only have salted, that’s fine, just skip adding extra salt)
For the Filling
- 2 (8 oz) packages full-fat cream cheese, softened to room temperature (crucial for smoothness!)
- 1/2 cup granulated sugar
- 1 teaspoon pure vanilla extract
- 1/2 teaspoon peppermint extract (start with less if you’re sensitive, you can always add more)
- Green food coloring gel (optional, but it makes it so fun – a tiny drop does the trick)
- 1 1/2 cups cold heavy whipping cream
For the Topping
- 1/2 cup roughly chopped Mint Oreos (about 5-6 cookies)
- Optional: A few whole Oreos and mint leaves for fancying it up
Instructions
Make the Crust
- Grab your 9×9 inch baking pan. Line it with parchment paper, leaving some overhang on two sides. This is your future lifeline for lifting out perfect bars.
- Toss all the Mint Oreos (cream filling and all!) into a food processor. Pulse until you get fine crumbs. No processor? A heavy-duty zip-top bag and a rolling pin work great. Channel your frustrations into it.
- Dump the crumbs into a bowl and pour the melted butter over them. Mix until it looks like dark, damp sand.
- Press this mixture firmly and evenly into the bottom of your prepared pan. I use the bottom of a flat cup to get it nice and tight. Pop it in the fridge to set up while you make the filling.
Make the Filling
- In a large bowl, beat the softened cream cheese with an electric mixer until it’s completely smooth and creamy. No lumps allowed! This takes a minute or two.
- Beat in the sugar, vanilla extract, and peppermint extract until just combined. Taste it. Want more mint? Add a tiny bit more extract now. Want it green? Add a drop of coloring gel and mix.
- In a separate, clean bowl (or in the bowl of a stand mixer), whip the cold heavy cream on high speed until stiff peaks form. You should be able to turn the bowl upside down without it falling out.
- Now, the gentle part. Add about a third of the whipped cream to the cream cheese mixture. Use a spatula to fold it in until no white streaks remain. This lightens the base. Then, gently fold in the rest of the whipped cream until everything is just combined and beautifully fluffy. Don’t over-mix!
Assemble & Chill
- Pour this dreamy mint filling over your chilled crust. Use your spatula to spread it out evenly.
- Sprinkle the top with the roughly chopped Oreo pieces, pressing them in lightly so they stick.
- Cover the pan tightly with plastic wrap. Now, the hardest part: patience. You need to let it chill in the fridge for at least 6 hours, but overnight is absolutely ideal. It needs time to firm up perfectly so you can get those clean slices.
- When it’s time, use the parchment paper ‘handles’ to lift the whole slab out of the pan. Place it on a cutting board and slice into bars with a sharp knife (wiping it clean between cuts helps).
- Serve cold. Watch the magic happen.
10) Nutrition
Serving Size: 1 bar | Calories: 410 | Sugar: 28g | Sodium: 220mg | Fat: 28g | Saturated Fat: 15g | Carbohydrates: 35g | Fiber: 1g | Protein: 4g | Cholesterol: 70mg


Leave a Comment