

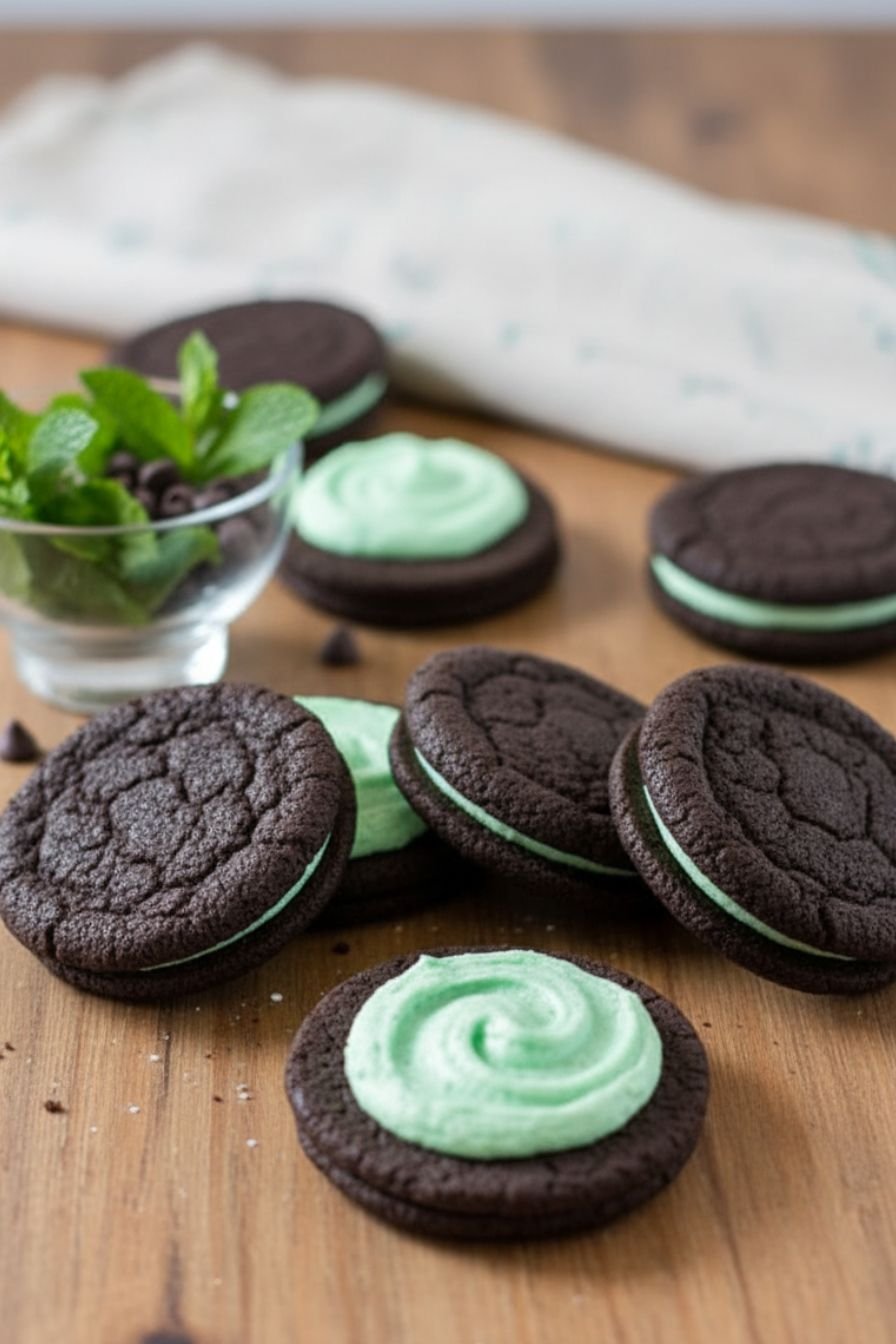
Ever try that green-hued, cool-as-a-cucumber cookie in the blue package and think, “I could make these better”? I did, and let me tell you, we were right. This homemade mint Oreos recipe ditches the plastic wrap for a cookie that snaps with dark chocolate promise and holds a creamy, minty filling that tastes real. It’s a mint chocolate recipe for anyone who’s ever felt a cookie could use a little more personality. Now, you’ll see mint chocolate desserts all over, from dense mint chocolate brownies to those trendy mint chocolate cupcakes. But friends, there’s something deeply satisfying about a perfect sandwich cookie. It’s a mint chocolate chip cookie’s elegant cousin. These are not fussy. If you can mix a dough and pipe frosting, you’ve got this. I made a batch last Christmas, you know, as one does. The house smelled like a chocolate shop, and my nephew ate the first test batch straight off the cooling rack. No regrets. The flavor is a cool mint rush with a serious chocolate backbone. It’s the kind of mint dessert recipe that makes a Tuesday feel like an occasion.

Table of Contents
- 1) Key Takeaways
- 2) Easy Homemade Mint Oreos Recipe
- 3) Ingredients for Homemade Mint Oreos
- 4) How to Make Homemade Mint Oreos
- 5) Tips for Making Homemade Mint Oreos
- 6) Making Homemade Mint Oreos Ahead of Time
- 7) Storing Leftover Homemade Mint Oreos
- 8) Try these Dessert next!
- 9) Homemade Mint Oreos
- 10) Nutrition
1) Key Takeaways
- What’s the secret to that classic Oreo texture?
- Can you really make mint chocolate recipes taste better than store-bought?
- What’s the one ingredient you shouldn’t skip for authentic flavor?
- How do you keep the filling from squishing out when you bite?
2) Easy Homemade Mint Oreos Recipe
Let’s be honest. We’ve all stood in the cookie aisle, looked at that blue package, and thought, “I bet I could make these.” Maybe you’ve even tried some mint chocolate recipes before. But here’s the thing about these homemade mint Oreos. They’re not just a copy. They’re an upgrade.

I remember the first time I made these for a holiday party. My friend Sarah, who claims to hate “green cookies,” ate three before I could even put them on a plate. The texture surprised her most. That perfect snap when you bite into the dark chocolate cookie, followed by the cool, creamy mint filling that actually tastes like peppermint, not just green food coloring. That’s the magic of controlling your ingredients.
This recipe falls firmly in the “worth the effort” category. It’s not throwing five things in a bowl, but the steps are simple. You mix a dough, roll some balls, bake them, and whip up a filling. If you’ve ever made chocolate crinkle cookies or buttercream frosting, you already have the skills. The result feels like a real accomplishment, and honestly, it’s kind of fun to play cookie architect. Mint dessert recipes don’t get much more satisfying than this.

3) Ingredients for Homemade Mint Oreos
Unsalted Butter, room temperature: This is non-negotiable. Truly soft butter creams with the sugar to create the cookie’s light texture. If your butter is cold, you’ll get dense, tough cookies. I leave mine on the counter for a good two hours. If you’re impatient, you can cut it into tablespoons and give it a 10-second zap in the microwave, but be careful. Melted butter is a different recipe.
Granulated Sugar & Egg: Standard baking players here. The sugar sweetens and helps with browning. The egg binds everything together and adds richness. I use large eggs, straight from the fridge. They’ll warm up quickly when mixed with the butter.
Vanilla Extract: A splash of good vanilla adds depth to the chocolate flavor. It keeps the cookies from tasting one-dimensional. Don’t skip it, even if the mint is the star later.
All-Purpose Flour: The structure. I usually just scoop and level my flour. For these cookies, I find that method works fine. No need for a kitchen scale unless you’re a precision baker.
Dutch-Process Cocoa Powder: This is the secret weapon. Dutch-process cocoa is treated to neutralize its acidity. It’s darker, richer, and less bitter than natural cocoa. It gives these cookies their signature deep, almost black color and that classic Oreo taste. If you use natural cocoa, your cookies will be lighter brown and have a fruitier, more acidic chocolate flavor. Still good, but different.
Baking Soda & Salt: The baking soda gives the cookies a little lift. The salt is absolutely critical. It enhances every other flavor in the bowl, balancing the sweetness and making the chocolate and mint sing. I use kosher salt.
Powdered Sugar & Heavy Cream: For the filling. Powdered sugar dissolves into a smooth cream, no graininess. The heavy cream (or milk in a pinch) makes the filling light and spreadable. It also helps the flavors blend.
Peppermint Extract & Green Food Coloring: Pure peppermint extract gives that clean, cooling flavor. Mint extract often contains spearmint, which can taste like toothpaste. Go for peppermint. The food coloring is purely visual, but let’s be real—that bright green is part of the fun. A few drops do the trick.
4) How to Make Homemade Mint Oreos
Step 1. Prep and Cream. Start by heating your oven to 350°F. Line your baking sheets with parchment paper. Trust me on this. Silicone mats work, but parchment gives the bottoms the perfect slight crisp. In a big bowl, beat the soft butter and granulated sugar together on medium-high speed. You want it pale, fluffy, and almost like a thick whipped cream. This takes a solid 3-4 minutes. Don’t cut corners. Scrape the bowl down once, then beat in the egg and vanilla until just combined.
Step 2. Whisk Dry, Then Combine. In a separate bowl, grab a whisk. Toss in the flour, Dutch-process cocoa, baking soda, and salt. Whisk it all together until you don’t see any streaks of white flour. This also breaks up any cocoa lumps. With your mixer on low, gradually add the dry ingredients to the butter mixture. The dough will be thick, dark, and a bit sticky. That’s perfect. If it feels too soft to handle, you can pop it in the fridge for 20 minutes, but I usually just flour my hands a bit.
Step 3. Shape and Bake. Roll the dough into small balls, about 1 inch across. I use a small cookie scoop for consistency. Place them on your prepared sheets, leaving about 2 inches of space. They spread. Now, flatten each ball with the smooth bottom of a glass or measuring cup. You can dip the glass in sugar to prevent sticking. You want even circles about 1/4-inch thick. Bake for 9-11 minutes. The tops will look dry and set, but they’ll still be soft in the center. That’s key. Let them cool on the sheet for 5 full minutes—they’ll firm up—then transfer to a wire rack to cool completely.
Step 4. Make the Filling. While the cookies cool, tackle the filling. Beat the room-temperature butter until it’s smooth and creamy. Add the powdered sugar, one cup at a time, starting on low speed unless you want a sugar dust storm. Once incorporated, add the cream, peppermint extract, food coloring, and a tiny pinch of salt. Now crank the mixer to medium-high and beat for 2-3 minutes. Watch it transform from grainy to light, fluffy, and voluminous. It should hold a peak when you lift the beater.
Step 5. Assemble. This is the fun part. Match your cooled cookies into pairs of similar size. Pipe or spoon a generous tablespoon of filling onto the flat side of one cookie. Gently press its partner on top, twisting slightly to spread the filling to the edges. Don’t smash too hard, or you’ll have a minty leak. Let them sit for about 30 minutes so the filling sets up a bit. Then, try to eat just one. I dare you.
5) Tips for Making Homemade Mint Oreos
Let’s talk about cookie texture, because that’s what makes a mint chocolate dessert special. The snap is everything. Your biggest friend here is the Dutch-process cocoa. It really is the difference between a good cookie and a great one. If your grocery store doesn’t carry it, look online. I keep a bag in my pantry just for these and my favorite mint chocolate brownies.
Temperature matters more than you think. Room temperature butter for both the cookies and the filling isn’t a suggestion—it’s the law. Cold butter won’t cream properly, and your filling will be lumpy. If your kitchen is warm and the dough gets too sticky as you’re rolling, just chill it for 20 minutes. No big deal. Better to wait than fight a sticky mess.
Don’t overbake. Those 9-11 minutes are a guideline. My oven runs hot, so mine are perfect at 9. The cookies will continue to firm up as they cool on the sheet. If you bake them until they’re firm in the center, they’ll turn into little chocolate rocks once cooled. A slightly soft center means a perfect, snappy texture later. It’s the same principle I use for mint chocolate chip cookies—underbaking slightly is your safety net.
6) Making Homemade Mint Oreos Ahead of Time
I’m a big fan of breaking up kitchen projects, and this recipe is perfect for that. You can make the cookie dough, roll it into balls, and flatten them on the parchment-lined sheets. Then, instead of baking, slide the entire sheet into the freezer. Once the dough balls are frozen solid, transfer them to a zip-top bag. They’ll keep for a good two months.
When a cookie craving hits (or you have unexpected guests), just pull out however many you need, place them on a sheet, and bake. You might need to add a minute or two to the bake time since they’re going in frozen. This method is a lifesaver during the holidays. Fresh baked cookies, ready in 15 minutes, with zero mess when you need them most.
The filling can also be made ahead. Whip it up, store it in an airtight container in the fridge for up to 3 days. When you’re ready to use it, let it sit on the counter for 30 minutes to soften, then give it a quick re-whip with your mixer to bring back that fluffy texture. This is my strategy for mint chocolate desserts when I’m planning a party—do the components ahead, assemble the day of, and look like a total baking rockstar with minimal stress.
7) Storing Leftover Homemade Mint Oreos
If you have leftovers—a big if in my house—they store beautifully. The key is keeping them in a single layer. Piling them up squishes the filling. I use an airtight container with a sheet of parchment paper between layers if I must stack them. They’ll stay fresh and snappy at room temperature for about 5 days.
You can also freeze the fully assembled cookies. Place them in a single layer on a baking sheet to freeze solid first, about an hour, then transfer to a freezer bag or container. They’ll keep for 2-3 months. Thaw them at room temperature for an hour before serving. The texture holds up surprisingly well. The cookie might soften a tiny bit, but the minty filling stays perfect.
Avoid the refrigerator. The cold, humid environment is the enemy of the cookie’s crisp texture. It makes them soft and chewy, which isn’t what we’re going for here. Room temperature in a sealed container is your best bet for maintaining that iconic homemade Oreo experience. It’s the same rule I follow for other fresh mint recipes where texture is key.
8) Try these Dessert next!


9) Homemade Mint Oreos

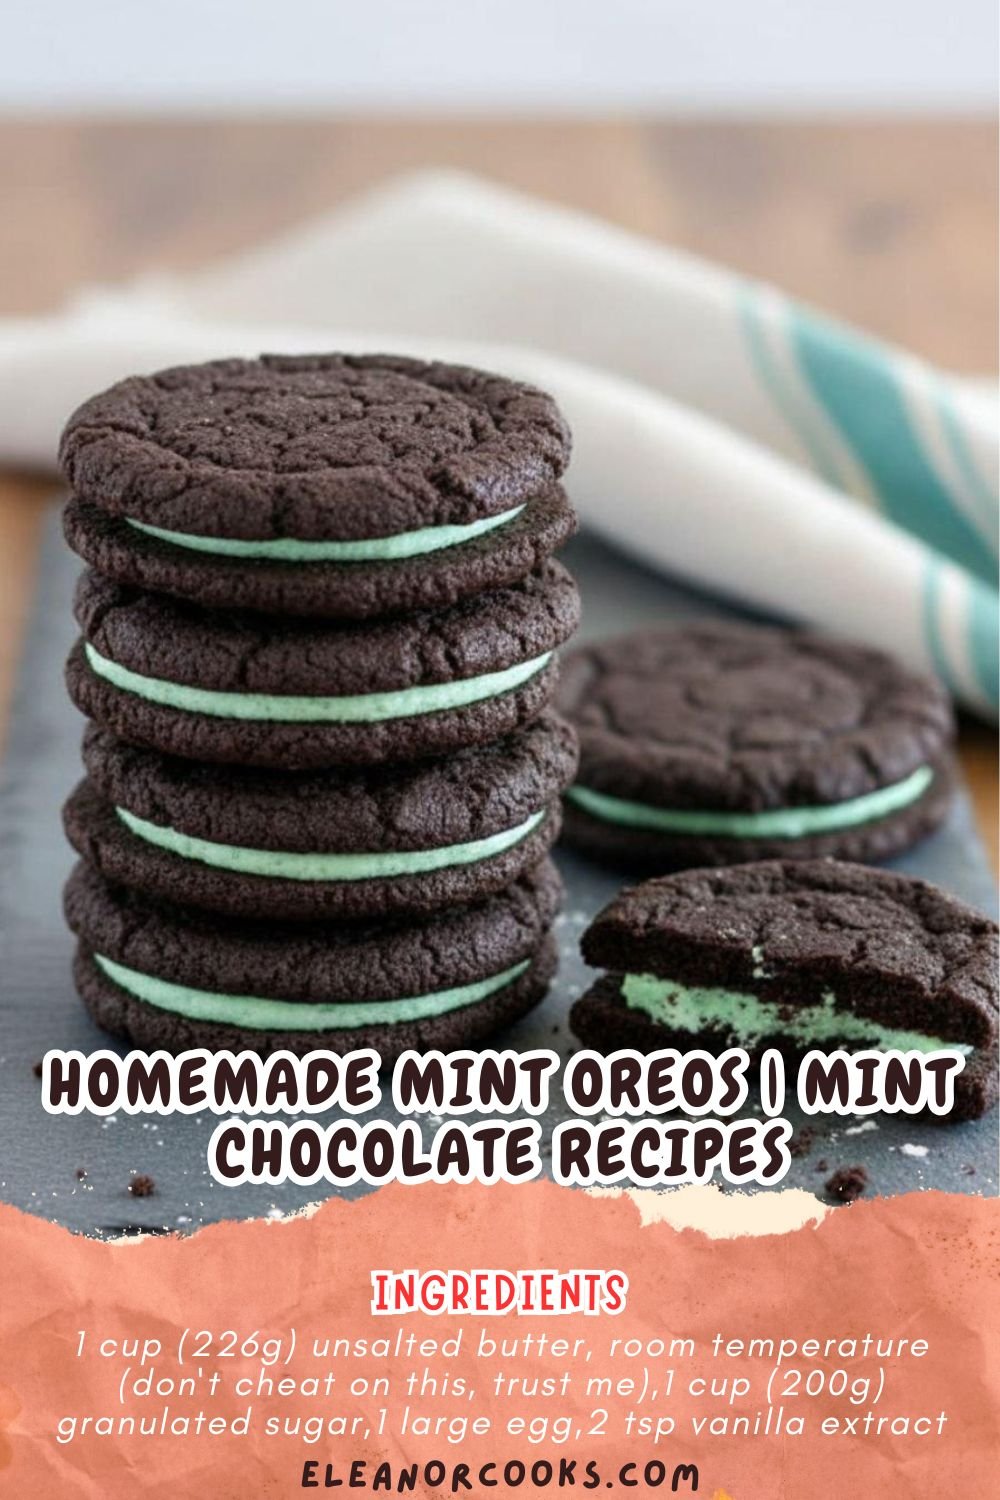
Homemade Mint Oreos: A Mint Chocolate Recipe
Ingredients
For the Chocolate Cookies
- 1 cup (226g) unsalted butter, room temperature (don’t cheat on this, trust me)
- 1 cup (200g) granulated sugar
- 1 large egg
- 2 tsp vanilla extract
- 2 cups (250g) all-purpose flour
- 1 cup (85g) Dutch-process cocoa powder (this is key for that deep color and flavor)
- 1/2 tsp baking soda
- 1/2 tsp salt
For the Mint Filling
- 1/2 cup (113g) unsalted butter, room temperature (again, soft is the word!)
- 2 cups (240g) powdered sugar
- 2 tbsp heavy cream or milk
- 1 1/2 tsp peppermint extract (or to taste, I like mine pretty punchy)
- A few drops green food coloring (optional, but it just feels right)
- A tiny pinch of salt to balance the sweetness
Instructions
Make the Cookies
- Preheat your oven to 350°F (175°C). Line a couple baking sheets with parchment paper. No one likes a stuck cookie.
- In a large bowl, cream the butter and sugar together until it’s light and fluffy. It should look pale and feel like clouds. This takes a few minutes with a mixer. Don’t rush it!
- Beat in the egg and vanilla extract until just combined.
- In a separate bowl, whisk together the flour, cocoa powder, baking soda, and salt. I sift mine to get rid of any cocoa lumps, but a good whisk works too.
- Gradually add the dry ingredients to the butter mixture, mixing on low speed until a soft, slightly sticky dough forms. It will be dark and beautiful.
- Roll the dough into small balls, about 1-inch in diameter. Place them on the prepared baking sheets, leaving about 2 inches between them because they’ll spread.
- Now, press each ball down slightly with the bottom of a glass or your palm. You want a nice, even circle.
- Bake for 9-11 minutes. The cookies will puff and then look set. They might seem a little soft in the middle; that’s fine. Let them cool on the sheet for 5 minutes before moving to a wire rack to cool completely. They firm up as they cool.
Make the Filling & Assemble
- While the cookies cool, make the filling. Beat the butter until smooth and creamy.
- Add the powdered sugar, one cup at a time, mixing on low at first so you don’t end up in a sugar cloud. Once it’s mostly combined, add the heavy cream, peppermint extract, food coloring (if using), and salt.
- Turn the mixer to medium-high and beat for 2-3 minutes until the filling is super light, fluffy, and holds its shape. It should be smooth, not grainy.
- Match up your cooled cookies into pairs of similar sizes. It’s like a cookie dating game.
- Pipe or spoon a generous dollop of mint filling onto the flat side of one cookie. Gently press its partner on top, twisting slightly to spread the filling to the edges. If you press too hard, it squirts out the sides. Not a tragedy, just a little messy. Let them set for about 30 minutes so the filling firms up.
10) Nutrition
Serving Size: 1 sandwich cookie, Calories: 180, Sugar: 15 g, Sodium: 85 mg, Fat: 10 g, Saturated Fat: 6 g, Carbohydrates: 22 g, Fiber: 1 g, Protein: 2 g, Cholesterol: 30 mg


Leave a Comment