
I need to confess something. My first attempt at a birthday cake was a disaster of epic proportions. We’re talking lopsided layers, frosting that could double as mortar, and a texture somewhere between a brick and a brownie. Ever since, I’ve been on a quest for a cake that delivers maximum joy with minimal effort. A cake you can make with one bowl, a whisk, and maybe a toddler helper if you’re feeling brave. This, my friends, is that cake. It’s the ultimate recipe chocolate hack, a true hero among Easy Chocolate Dessert Recipes. You might know this method as a Cake Mix Dump Cake, but trust me, this version feels anything but “dumped.” The batter comes together in about 5 minutes flat. The result is a rich, fudgy, incredibly moist cake that’s perfect for a last-minute celebration or a Tuesday night treat. If you love Dump cake recipes, you’ll adore this one. It’s so simple, the method could easily inspire a Peach Dump Cake Easy or even an Easy Vegan Cake with a few swaps. But for now, let’s stick with classic, glorious chocolate. Are you ready to bake a cake that will make you look like a superstar? Grab your pan, and let’s get messy.
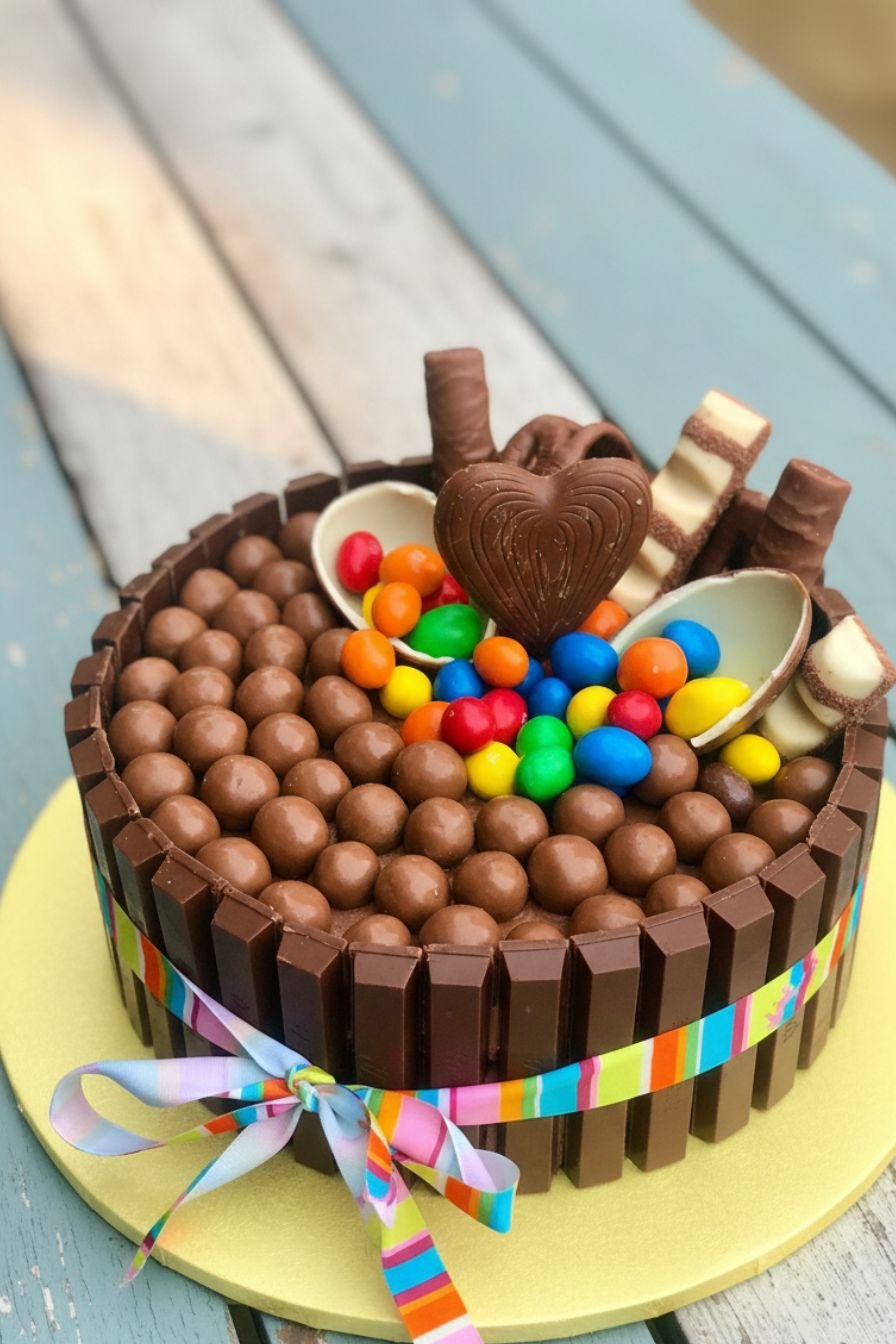
Table of Contents
- 1) Key Takeaways
- 2) Easy My (Almost) Famous No-Fuss Chocolate Dump Cake Recipe
- 3) Ingredients for My (Almost) Famous No-Fuss Chocolate Dump Cake
- 4) How to Make My (Almost) Famous No-Fuss Chocolate Dump Cake
- 5) Tips for Making My (Almost) Famous No-Fuss Chocolate Dump Cake
- 6) Making My (Almost) Famous No-Fuss Chocolate Dump Cake Ahead of Time
- 7) Storing Leftover My (Almost) Famous No-Fuss Chocolate Dump Cake
- 8) Try these Dessert next!
- 9) My (Almost) Famous No-Fuss Chocolate Dump Cake
- 10) Nutrition
1) Key Takeaways
- This chocolate dump cake is the definition of a one-bowl wonder. You literally dump most of the ingredients in and stir. It’s my go-to when I need a showstopper but my brain is already on weekend mode.
- Don’t panic when you add the boiling water. The batter will look like a chocolate soup disaster. That’s the secret to the most incredibly moist, tender crumb you’ve ever had in a cake. I promise it works.
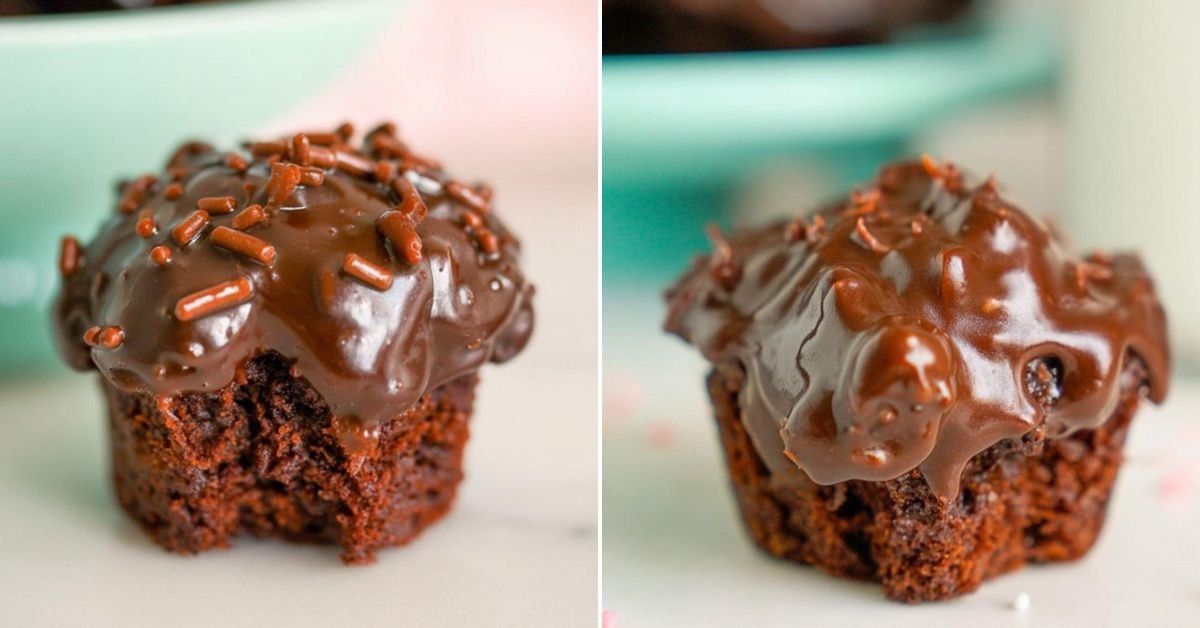
- Forget fancy decorating. A thick slather of that easy chocolate frosting and a handful of sprinkles makes this cake look like you spent hours. The rustic, homemade look is part of its charm.
- This recipe is a master template. Master this easy chocolate dessert recipe, and you can make a peach dump cake easy by swapping in a can of peaches, or turn it into an easy vegan cake with a couple of simple swaps.
2) Easy My (Almost) Famous No-Fuss Chocolate Dump Cake Recipe
Let’s be real. Sometimes you just need cake. Not a project that dirties every bowl in your kitchen, but a real, honest-to-goodness, deeply chocolatey cake that appears with minimal fuss. That’s exactly what this chocolate dump cake delivers. I call it “almost famous” because every time I bring it somewhere, people ask for the recipe. It’s that good.
The beauty of this cake mix dump cake style recipe is its sheer simplicity. We’re talking ten minutes of active work, max. You whisk dry ingredients, add the wet stuff, and pour in hot water. The method feels almost too easy to be true, but the result is a rich, fudgy layer cake that’s foolproof. I’ve made it for birthdays, potlucks, and even just because it was Wednesday.
If you’re new to dump cake recipes, welcome! You’ve picked a great place to start. This is the ultimate gateway cake. It builds confidence because it’s nearly impossible to mess up. Once you nail this, you’ll see how the basic formula works for so many other desserts. It’s the foundation for countless easy chocolate dessert recipes.

3) Ingredients for My (Almost) Famous No-Fuss Chocolate Dump Cake
All-purpose flour: The workhorse of the cake. Just spoon and level it into your measuring cup for accuracy. No need to sift, I never do.
Granulated sugar: Sweetens the deal and helps create that lovely tender texture. Don’t skimp here.
Unsweetened cocoa powder: This is where the magic happens. Use a good quality one you like the taste of. A dark cocoa powder gives a richer flavor, but regular works perfectly.
Baking powder & Baking soda: Our leavening dream team. They work together to give the cake its perfect rise and open crumb. Make sure yours isn’t older than your last relationship.
Salt: A pinch might seem small, but it makes the chocolate flavor pop. It’s the secret weapon in every sweet recipe.
Eggs: They bind everything together and add richness. Room temperature eggs mix in more smoothly, but if you forget (I always do), just use them cold. It’ll be fine.
Milk: Whole milk gives the best flavor, but any milk you have will do. This is a no-judgment zone.
Vegetable oil: Oil keeps this cake supremely moist, even a day or two later. It’s the key to that melt-in-your-mouth quality.
Vanilla extract: The flavor enhancer. Pure vanilla is lovely, but use what you’ve got. A splash of almond extract is also a fun twist.
Boiling water: Yes, really. This is the signature move of this chocolate dump cake. It blooms the cocoa powder, making the flavor intense, and creates that surprisingly thin batter that bakes into cloud-like lightness.
4) How to Make My (Almost) Famous No-Fuss Chocolate Dump Cake
Step 1. Prep your pans and oven. Heat your oven to 350°F. Grease two 9-inch round cake pans with butter or cooking spray. I’m a firm believer in lining the bottoms with parchment paper circles. It’s the only guarantee your cakes will slide out in one piece. Trust me on this.
Step 2. The big dump. Grab your largest mixing bowl. Dump in the flour, sugar, cocoa powder, baking powder, baking soda, and salt. Whisk it all together until you don’t see any streaks of white flour. This is your dry team, all ready to go.
Step 3. Bring in the wet team. Make a well in the center of your dry ingredients. Crack in the eggs, pour in the milk, oil, and vanilla. Use an electric mixer on medium speed to beat it for about two minutes. The batter will be thick, glossy, and gorgeous.
Step 4. The hot water moment. Here’s where you might doubt me. Carefully pour the boiling water into the batter. It will immediately thin out and look like a runny chocolate pancake batter. This is correct! Don’t worry. Just stir it with a spatula until it’s smooth.
Step 5. Bake. Divide the thin batter between your prepared pans. It will seem like not enough, but it rises beautifully. Bake for 30-35 minutes. The cake is done when a toothpick inserted in the center comes out with a few moist crumbs attached.
Step 6. Cool completely. Let the cakes cool in their pans for 10 minutes. Then, run a knife around the edges and flip them out onto a wire rack. Peel off the parchment. Let them cool completely before you even think about frosting. Warm cake melts frosting into a sad puddle.
5) Tips for Making My (Almost) Famous No-Fuss Chocolate Dump Cake
My number one tip? Don’t overthink it. This recipe is designed for success. If your batter looks too thin, you’re doing it right. If you forget to bring your eggs to room temperature, just use them cold. The cake might be a smidge denser, but it will still taste amazing. Perfection is the enemy of good cake.
For the frosting, make sure your butter is truly soft. Leave it on the counter for an hour. If you try to beat cold butter, you’ll just get lumpy frosting and a sore arm. When adding the powdered sugar, start your mixer on the lowest setting unless you want a sweet, white dust cloud decorating your kitchen.
If your cakes dome a bit in the middle, you can level them with a serrated knife for a perfectly flat stack. I usually don’t bother. I think a little dome gives it character, and you can always hide it with extra frosting. More frosting is never a bad thing.
6) Making My (Almost) Famous No-Fuss Chocolate Dump Cake Ahead of Time
This cake is a dream for planning. You can bake the cake layers up to two days in advance. Once they’re completely cool, wrap each layer tightly in plastic wrap and keep them at room temperature. The frosting actually tastes better if it sits for a bit, too. You can make it a day ahead, cover it, and store it in the fridge. Just let it come back to a spreadable consistency on the counter before you use it.
The real time-saver is assembling the whole cake a day before you need it. Frost it, cover it loosely with a cake dome or an upside-down bowl, and leave it on the counter. The flavors meld, the texture becomes even more tender, and you get to relax on the day of your event. It’s a win-win.
For a last-minute shortcut, you can absolutely use a good store-bought chocolate frosting. I won’t tell. The beauty of this cake is its adaptability. The homemade frosting is divine, but sometimes you just need to get a cake on the table.
7) Storing Leftover My (Almost) Famous No-Fuss Chocolate Dump Cake
Leftovers? That’s optimistic. But if you do have some, store any leftover cake in an airtight container at room temperature. It will stay fresh and moist for about three days. The oil in the recipe keeps it from drying out quickly.
If your kitchen is very warm or humid, you might prefer to store it in the fridge. The cold will firm up the frosting, so let a slice sit out for 15 minutes before eating to let it soften up again. The texture is best at room temperature.
You can also freeze this cake. Wrap individual slices or the whole cake (without any delicate decorations) tightly in plastic wrap and then foil. It will keep for up to three months. Thaw it overnight in the fridge or for a few hours on the counter.
8) Try these Dessert next!

9) My (Almost) Famous No-Fuss Chocolate Dump Cake

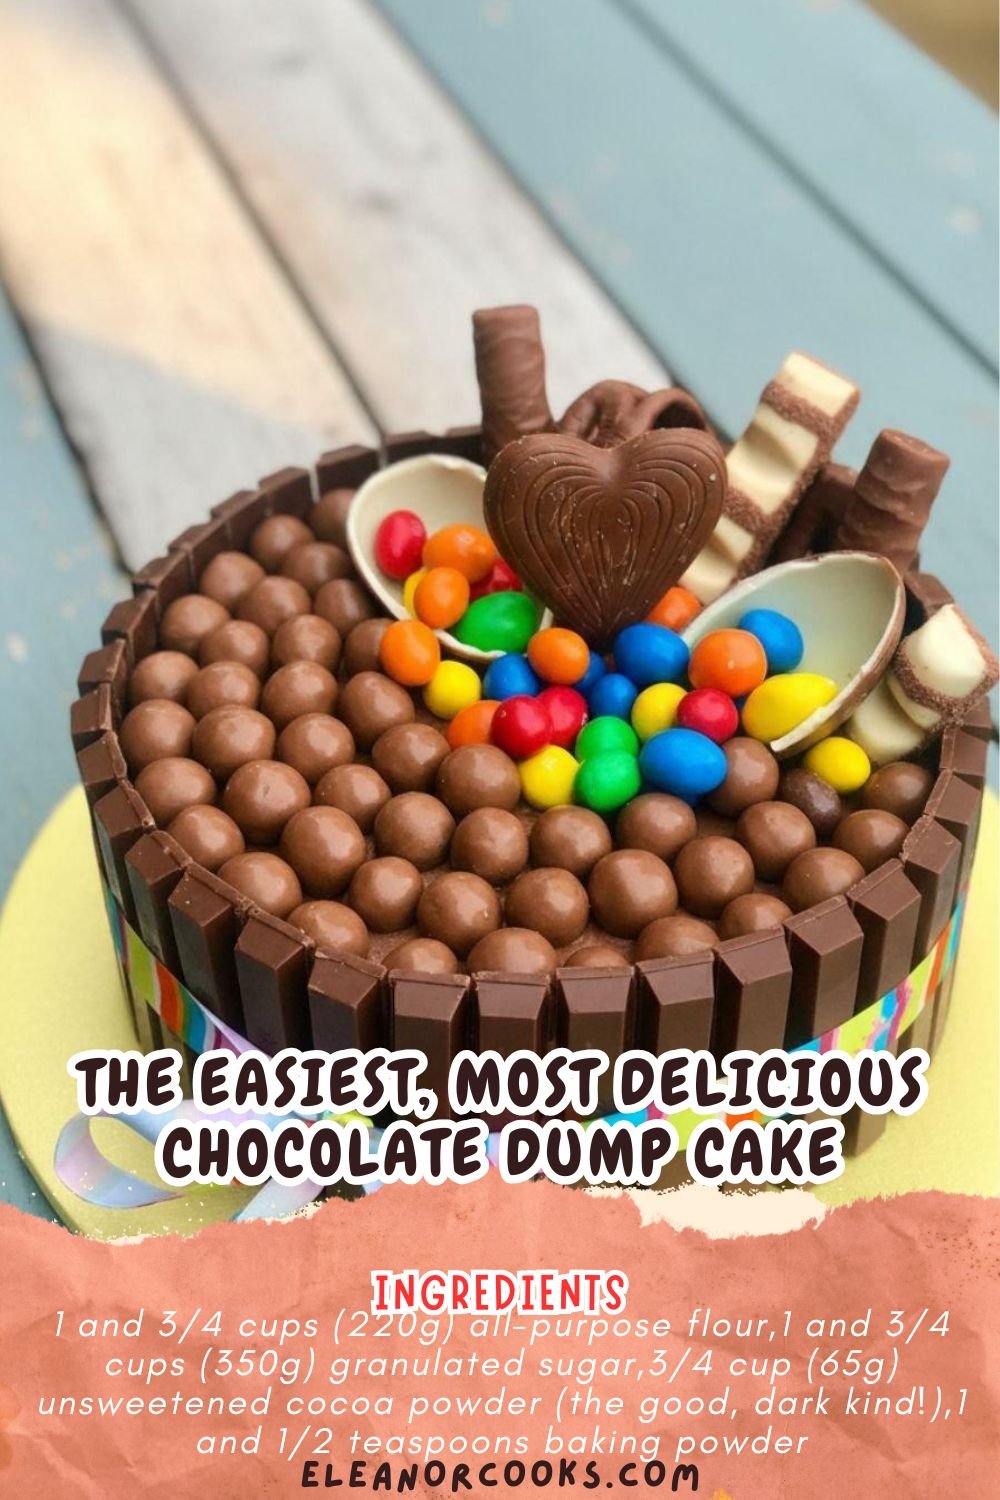
My (Almost) Famous No-Fuss Chocolate Dump Cake
Ingredients
For the Cake
- 1 and 3/4 cups (220g) all-purpose flour
- 1 and 3/4 cups (350g) granulated sugar
- 3/4 cup (65g) unsweetened cocoa powder (the good, dark kind!)
- 1 and 1/2 teaspoons baking powder
- 1 and 1/2 teaspoons baking soda
- 1 teaspoon salt
- 2 large eggs, at room temperature
- 1 cup (240ml) whole milk (or your preferred milk)
- 1/2 cup (120ml) vegetable oil
- 2 teaspoons pure vanilla extract
- 1 cup (240ml) boiling water (yep, boiling!)
For the Chocolate Frosting
- 1 and 1/2 cups (340g) unsalted butter, softened
- 1 cup (95g) unsweetened cocoa powder
- 5 cups (600g) powdered sugar, sifted
- 1/2 cup (120ml) milk
- 2 teaspoons vanilla extract
- A pinch of salt
Instructions
For the Cake
- Heat your oven to 350°F (180°C). Grease and line two 9-inch round cake pans. I use parchment paper circles—they’re lifesavers.
- In a gigantic bowl, whisk together all the dry stuff: flour, sugar, cocoa, baking powder, baking soda, and salt. Get it all nice and combined.
- Add the eggs, milk, oil, and vanilla to the dry ingredients. Beat with an electric mixer on medium for about 2 minutes. The batter will be thick and shiny.
- Here’s the fun part. Carefully pour in the boiling water. The batter will look alarmingly thin and liquidy. This is perfectly normal! Just stir it until it’s smooth. It’s like magic.
- Divide the batter evenly between your prepared pans. Slide them into the oven and bake for 30 to 35 minutes. You’ll know they’re done when a toothpick poked in the center comes out clean or with a few moist crumbs.
- Let the cakes cool in their pans for 10 minutes, then turn them out onto a wire rack to cool completely. This step is non-negotiable unless you want warm frosting soup.
For the Frosting & Assembly
- While the cakes cool, make the frosting. Beat the softened butter in a large bowl until it’s creamy and pale.
- Add the cocoa powder and beat again until fully incorporated.
- Gradually add the powdered sugar, about a cup at a time, alternating with splashes of milk. Beat on low at first unless you want a powdered sugar snowstorm in your kitchen.
- Add the vanilla and salt, then crank the mixer to high and beat for 2-3 minutes until the frosting is light, fluffy, and spreadable.
- To assemble, place one cake layer on your serving plate. Plop a big dollop of frosting on top and spread it evenly to the edges.
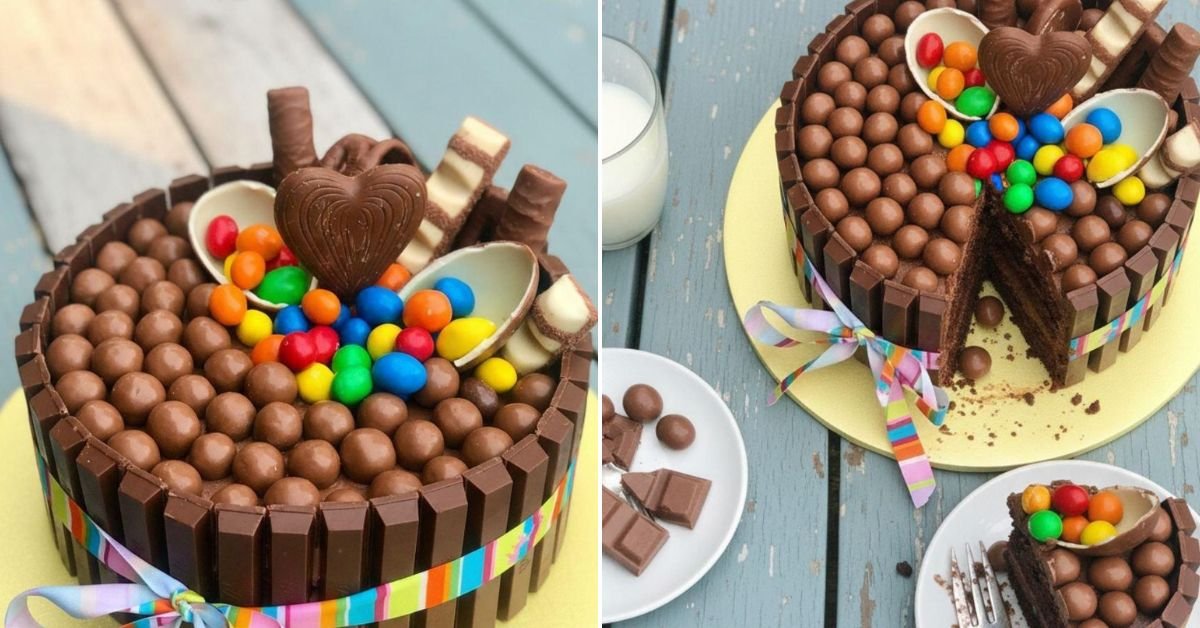
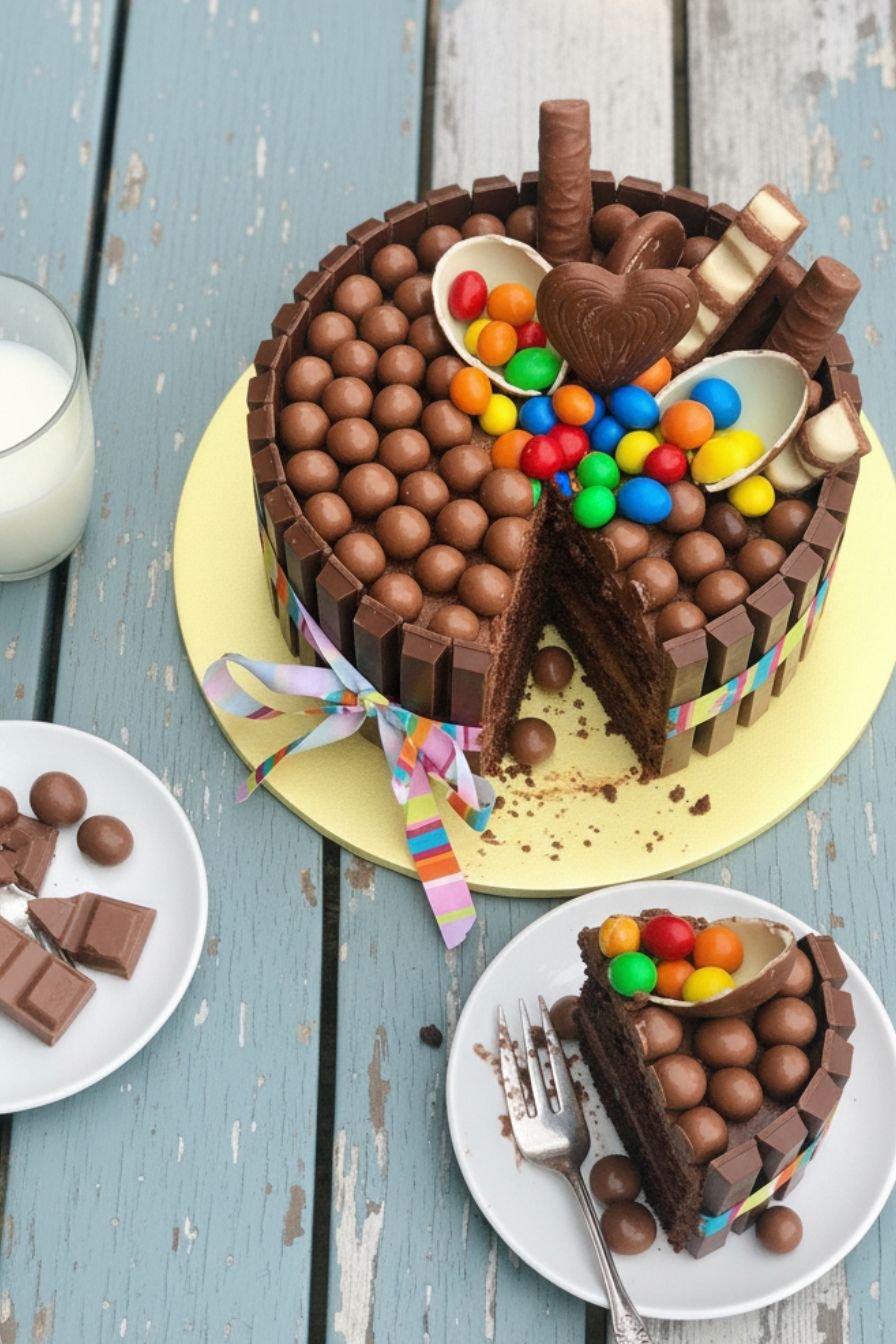
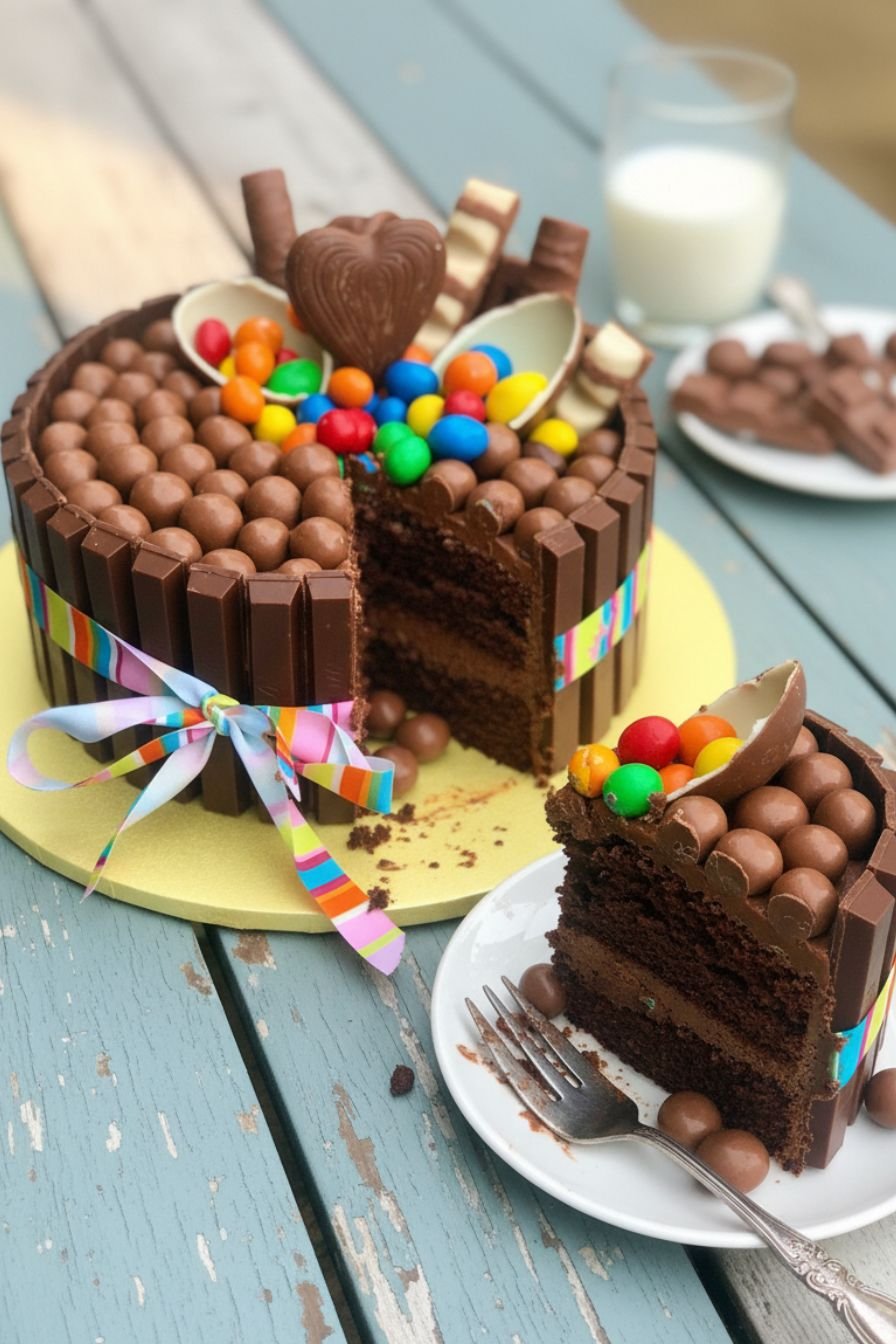
- Gently place the second layer on top. Use the remaining frosting to cover the top and sides of the cake. Don’t worry about it being perfectly smooth—rustic charm is totally in. Decorate with sprinkles if you’re feeling festive!
10) Nutrition
Serving Size: 1 slice | Calories: 580 | Sugar: 65g | Sodium: 380mg | Fat: 28g | Saturated Fat: 14g | Carbohydrates: 85g | Fiber: 4g | Protein: 6g | Cholesterol: 75mg


Leave a Comment